Contents
This is not a shallow list of Google’s ranking factors; that would have been too vague. I wanted to instead gather all photography SEO ideas and turn them into straightforward actions to improve your site in Google’s eyes.
Prepare to take some time to go through this entire list and put in the hard work, all toward a photo website that both users and Google will love!
This article covers 50 (yes, fifty) SEO actions to go through:
- on-site & off-site SEO factors
- getting backlinks
- website performance & mobile-friendliness
- image optimization best practices
- free SEO tools
- examples & graphics
- links to other relevant articles & resources
Some of the actions are gathered from my 60+ Photography Website Mistakes guide while others are the result of tens of hours of extensive research. You will be learning SEO basics and more advanced tactics, how to avoid common SEO mistakes, how to increase conversion rates and promote your photography website online.
Be sure to also check out the statistics of the top 100+ photo websites to learn what famous photographers are doing in terms of SEO. And if you’re looking for something more in-depth, check out my SEO course for photographers.
Many of the actions below assume you also have a blog. From an SEO point of view, a blog certainly offers a lot more content for search engines to “digest”, it can help you rank higher in search results for certain keywords.
First of all, in order to harness all the ideas in this article, you should at least have a vague understanding of SEO and get acquainted with Google’s list of ranking factors. Here are some fantastic resources to get you started:
- The aptly-titled “What the heck is SEO & why should I care?”
- MOZ’s excellent “Beginner’s Guide to SEO”
- Google’s own interactive “How Search Works”
It would have been pointless to try to repeat these great pieces of content, or just put out a list of Google’s ranking factors. I wanted instead to extract all the photography-relevant ideas and turn them into clear actions you can take to improve your photo website in Google’s eyes.
If you’re overwhelmed by all of this and would rather hire an expert to handle all the SEO work for your photography website, check out my complete SEO review service for photographers. I’ll give you all the help and clarity you need to rank higher in Google.
Given this great diversity of ideas, I’ve tried to estimate their importance, as well as difficulty and time to implement. I’ve also tried sequencing them in a logical order, to make it easier for you to progress through them as you build or improve your website.
One of the mantras here at ForegroundWeb is to always start with WHY?
Intro:
Why is SEO important for your photography business
Photographers are very creative by nature, so SEO understandably falls under the gloomy area of “technical stuff”. But the fog is starting to lift.
The SEO industry has definitely matured over the last few years, and Google’s algorithms are becoming easier to understand. It’s true that many SEO aspects require some technical experience, but the SEO grand-scheme-of-things is becoming simpler.
By many estimates, there are over 200 signals that affect SEO rankings (though this is likely an exaggeration). Many of them fall into the “on-site” category (page titles, header tags, on-page copy etc.) – things that you can control.

The SEO community estimates that 60-80% of all click traffic goes to the first three search results. Not only that, but if users are not satisfied with the results, they’re more likely to refine their search than to go page 2 (once again, quality beats quantity). In fact, 75% of users never view the second page of search results.
So ranking well for relevant keywords leads to more visitors to your site, and, therefore, more sales or clients.
Not only that, but it’s one of the most cost-effective and future-proof investments you can make. If you’re not hiring an SEO company to do the work for you, and you’re handling your site’s SEO on your own, your only expense is time (unlike investing money in advertising).
And all your competitors are doing it. You can’t ignore the online market changes and just hope that your photography is good enough to rise to the surface. A mediocre photographer with a properly optimized site and well captioned/keyworded images can take business away from you. So you need to keep moving forward (because SEO is a long-term game) and improve your position in the photography industry.
Let’s get started!
1. Merge multiple websites into a single one (where appropriate)
Type: Domain factors Importance: 5/5 Difficulty: Hard Total time: It depends
Many photographers like to spread out their online presence into multiple sites, and then having them all link back to one main website. They hope that this will help their SEO, and we can understand why: having more links is better (both in terms of number and diversity).
But, in this case, it’s actually doing more harm than good, it’s losing much of the SEO value received from external sites.
Let’s take a fictitious example: John Doe has his main photography website at www.johndoephotography.com (which acts as his main portfolio). But then, for simplicity, he built his blog on a separate domain (like johndoephotoblog.com) and also has a separate website specifically dedicated to selling prints (johndoeprints.com).
He gets various backlinks pointing to his blog and prints sites, so this will obviously in turn help his main site’s SEO, right? That’s incorrect; the opposite is true.
He is basically losing SEO “power”. If only part of those backlinks pointed directly to his main site, his SEO would be in much better shape.

Those other domains are creating a (partial) barrier between brand/social signals (“link equity”) and your main website.
By collecting all of the ranking signals on one main domain, you built the best possible SEO scenario. Why? Because of the ever-important concept of “domain authority”.
When a domain becomes more popular, it passes its importance to all its different (internal) pages, so, in turn, they rank higher in search results. But the domain importance doesn’t get passed to other websites, so that’s basically true for the blog and prints domains in the John Doe example above. Their specific domain authority is somewhat lost when linking to the main domain.
And let’s not forget about simplicity: you’re left with only one website, you can focus on it alone. The entire online marketing process becomes much easier. Branding (and SEO as well, of course) will be simpler to work on.
Where isn’t this appropriate?
If the website topic is completely different (two truly separate photography specialties), it makes sense to break them into two. (But it also means you’re spreading your career into two, should you be focusing on one thing alone?)
Or sometimes it’s good to have a separate microsite for branding purposes (like promoting the images from an event on a mini online portfolio).
But for SEO purposes, one single domain is best.
Don’t take this lightly, there are exceptions. Deciding if you need to have one or multiple websites for your type(s) of work is critical, and should come before any other design or SEO considerations.
Learn how to navigate this compromise before proceeding: “Having separate photography websites or merging them?”

Further reading: 3rd part of this video (06:55) from Moz: How to Structure Links for SEO – Whiteboard Friday
2. Get a good domain name (if you don’t have one already)
Type: Domain factors Importance: 4/5 Difficulty: Medium Total time: Research + 10 min.
You know the basic ideas: the domain should be short, memorable and, if possible, include your brand name and/or relevant keywords for your business.
Photographers usually opt for their full name (johndoe.com) and sometimes add “photography” at the end (johndoephotography.com). Other suffixes (like “photographer” or “photo”) are less popular.
Too many people include hyphenated keywords in their domain (best-photography-in-the-world.com), but that’s not ideal. The very small SEO benefit you get from using keywords in the domain name is nothing compared to the zero branding value you have: it’s difficult to remember, it lacks credibility.
If you are considering switching to a shorter/different domain name for your site, you need to ensure a smooth migration to avoid any SEO problems: How to change your site’s domain name (URL) without losing SEO rankings (7 steps + FAQ)
Further reading:
- “Domain” knowledge base article (Moz)
- How Your Domain Name Will Impact SEO & Social Media Marketing (Search Engine Journal)
- How To Choose Domain Names For SEO (SeoBook)
- How to Choose the Right Domain Name (firstsiteguide.com)
- New top-level-domains (TLDs) for photographers (ForegroundWeb)
3. Renew your domain for a longer time
Type: Domain factors Importance: 0.1/5 Difficulty: Easy Total time: 15 min.
From an SEO standpoint, it’s always best to register (or extend) your domain name for many years in advance.
It’s like a commitment.
If Google notices that your domain is registered for more years to come, it considers it a sign of credibility. And that can give you a small SEO boost versus younger websites out there. Why? It’s because Google is always trying to fight spam websites (that don’t usually last more than a year).
Further reading: Google Says Domain Registrations Don’t Affect SEO, Or Do They? (Search Engine Land)
4. Host your own blog
Type: Domain factors, On-site Importance: 5/5 Difficulty: Hard Total time: It depends
A blog can obviously be a powerful SEO and marketing tool, and help you establish your photography brand and attract more/better clients.
But instead of using free blogging platforms like wordpress.com or others, you can gain a big SEO advantage if the blog is on your own domain. This is not to be confused with the self-hosted software from wordpress.org which gets setup on your own domain and is great for SEO.
Many photographers have a main portfolio site, but an external blog. So any links you get to your blog posts won’t help your main domain’s authority. So besides the important design implications (it might be confusing for visitors to leave the main site), you’re losing precious SEO value there.
Google loves good user experience signals, so use your blog to provide context to your readers: the way you shot those landscapes, the story behind those galleries, recent event/travel impressions, new photo gear experiments etc.
Where to place the blog is a whole nother story:

For simplicity and maximum SEO benefit (and unless you have more specific reasons or constraints), place it in a subfolder (johndoe.com/blog/)
Further reading:
- Setting up your new company blog. What’s better for SEO? (Rand Group)
- Which is best for blog SEO: separate domain, subdomain or subfolder? (Smart Insights)
- Root Domains, Subdomains vs. Subfolders and The Microsite Debate (Moz Blog)
5. Set up Google Search Console
Type: Tools Importance: 3/5 Difficulty: Easy Total time: 30 min.
It would be a stretch to assume that verifying your site in Google Search Console (formerly called Google Webmaster Tools) would directly influence your site’s indexing or search rankings. So let’s not go there. But the tool provides some fantastic insights into your site’s SEO and general “health”, that it’s impossible to ignore.
At its core, Search Console allows you to monitor and manage your site’s presence in Google search results. Based on Google’s respective help page (and from my experience), Search Console can help you in many ways; it’s really an invaluable tool!

 The redesigned dashboard in Google Search Console’s new user interface.
Seeing that I’m such a big fan, here are some important pages inside your Search Console account that you might wish to check from time to time.
More details about all these reports here: Webmaster Search Console Help Center
Further reading:
- The SEO Guide To Getting Started With Google Webmaster Tools (Search Engine Land)
- How-to Guide: 5 Ways to Use Google Webmaster Tools to Maximize Your SEO Campaign (Search Engine Journal)
- How to Use Google Webmaster Tools to Maximize Your SEO Campaign (Search Engine Watch)
- 8 Advanced Webmaster Tools You Should Be Using for Better SEO (Entrepreneur.com, written by Neil Patel)
6. Set up Google Analytics (and enable SEO reports & internal site search)
Type: Tools Importance: 2/5 Difficulty: Easy Total time: 15 min.
You can’t be serious about SEO and not use a good analytics tool. Unless you need very advanced reports (heat-maps, scroll-maps, mouse tracking etc.), Google Analytics is powerful and detailed enough to keep you covered.
Setting up should be pretty straightforward, just follow this checklist: Google Analytics Training – Get the most out of your reports.
There’s a ton of info out there about using Google Analytics so I won’t bore you. Here are a few great resources you should check out:
- Google Analytics for Photographers (PhotoShelter free guide)
- 10 Ways to Prove SEO Value in Google Analytics (Moz Blog)
- How 3 Simple Google Analytics Reports Will Increase Your Search Engine Traffic (QuickSprout)
- The 8 Google Analytics Features Every Site MUST Have Enabled (Neil Patel)
A few important things, though:

Google Analytics has a good integration with Search Console (of course), and you should definitely configure it and then learn to use those SEO reports.
The integration can be found in the Admin area, under “Property Settings”. Reports are in the “Acquisition” menu.
More on Google Analytics SEO reports here: New SEO Reports in Google Analytics Now Here (Moz Blog).
And while you’re at it, don’t forget to also configure your internal site search tracking (to see what people are searching for on your site). If you have multiple domains, make sure you’re correctly tracking things: How to Quickly (and Correctly) Track Google Analytics Across Multiple Domains (Moz Blog)
7. Do some planning & keyword research
Type: Planning Importance: 4/5 Difficulty: Hard Total time: It depends
I’ll be honest with you: this is a difficult topic to cover, and I was expecting a long time of writing and refining here. To my relief, I was impressed by the quality of PhotoShelter’s “SEO Guide for Photographers”:

Here are the relevant actions you need to know:
- Generate a list of relevant keywords (general, specific, colloquial)
- Check each keyword in ahrefs or Google’s Keyword Tool and find keyword ideas based on search volumes
- Learn more about those relevant keywords by searching for them online
- Study your “competition” to determine if you can indeed attract more backlinks on those specific keywords
- Plan on including the “winning” keywords into your future SEO efforts
The most powerful keyword research tool on the market is ahrefs’ Keywords Explorer 2:

I can understand this can be a daunting task, so it’s not for the faint-hearted. Even if it’s not worth your time at this stage, or it goes beyond your technical skills, you should at least read about it to familiarize yourself with the possibilities and take more informed decisions.
“It does not take much strength to do things, but it requires a great deal of strength to decide what to do.” – Elbert Hubbard
Further reading:
- Beginner’s Guide to SEO – Chapter 5: Keyword Research (Moz)
- How to do Keyword Research in 90 Minutes (Moz Blog)
- The Step-by-Step Guide on Improving Your Google Rankings Without Getting Penalized (Neil Patel)
- How to Do Keyword Research: A Beginner’s Guide (HubSpot Blog)
- The Buzz on Long Tail Keywords [Infographic] (SEO.com)
8. Submit a sitemap
Type: Indexing Importance: 3/5 Difficulty: Easy Total time: 15 min.
For your website to show up in search results, Google has to know about all your site’s pages and index them. This can happen organically over time, but a sitemap is a faster way to “help” Google.
Technically, XML sitemaps are well-formatted lists of your site’s pages, to help search engines “know” about your site structure and update frequency. This usually speeds up the indexing process.
A respectable website platform automatically generates an XML sitemap file for search engines. But depending on how your website is built, you might not have a sitemap, making it more difficult to get indexed by search engines.
So by all means, check with your developer to ensure that your site is generating a sitemap file and that it then gets properly submitted to Google Search Console. Alternatively, you can create them yourself using tools like https://www.xml-sitemaps.com/ or http://www.web-site-map.com/.
If using WordPress, this feature should automatically be included in the excellent “Yoast SEO” plugin. You just need to enable it by going to “SEO > XML Sitemaps”, and it will then automatically generate a sitemap for all your posts, pages, categories etc. and then submit it to Google & Bing to speed up their indexing process. It also your post images into the sitemap, allowing them to rank higher in Google’s Image search.
9. Double check your site’s robots.txt file
Type: Indexing Importance: 3/5 Difficulty: Easy Total time: 15 min.
The robots.txt file sits on in a site’s root (www.johndoe.com/robots.txt) and is a tool allowing you to restrict search engine from crawling specific pages or parts of the site (as well as indicate the location of your sitemap).
Very often, it is used to block all search engine crawling while the site is under development before being launched:
User-agent: *
Disallow: /
When the site is ready to be launched, the file should instead (at the very least) say:
User-agent: *
Disallow:
Sitemap: PATH/sitemap.xml
It’s perfectly fine to not have a robots.txt file (and thus allow all bots to index your site), but there might be scenarios where you’ll need one to fine tune some details.
Your Google Search Console account has a “robots.txt Tester” feature (in the Index coverage section) which allows you to double-check that Google can access your site’s pages.
Here’s an excellently written “Guide to the robots.txt file”. And another good one.
10. Encourage user activity with social sharing buttons
Type: User engagement Importance: 1/5 Difficulty: Medium Total time: 20 min.
While using Like/Tweet/+1 buttons is not traditionally known for its SEO benefits, it’s clear these days that Google is also using social media signals to rank websites. Consider it “social proofing”: there’s a strong degree of correlation between social activity and top search results.
However, we need to make a distinction. There are two types of social media buttons:
- social media profile links (usually in the form of small social media icons, linking to your respective profiles)
- social sharing buttons (Facebook Like, Facebook Share, Twitter Follow & Tweet buttons, Google +1, Google+ Share, Pinterest “Pin It” etc.)
Here they are both in action in Tikiwaka.com‘s footer:
![]()
Profile links are great, they raise awareness to your social media channels, you should include them at least on your Homepage and About page.
But sharing buttons are what we’re referring to here, and what you should consider including into every page of your website (especially the Homepage, all gallery and image pages, all blog posts).
Further reading: Why Social Sharing Buttons are so Important? (CodeBoxr)
11. Avoid using flash
Type: Indexing Importance: 4/5 Difficulty: Hard Total time: It depends
Adobe Flash used to be a cool technology; it allowed creating some attractive designs (animations, crossfading, full-screen slideshows etc.) But HTML5 and CSS3 have advanced so much lately that there’s no longer a reason no to use them to create amazing photo websites. And Apple’s lack of support for Flash on iOS devices has sealed flash’s fate.
You can no longer honestly look at quality responsive WordPress themes online and still find a compelling reason to use Flash instead.
Yes, I know, it’s that Flash thing again, you’ve probably read about it already in other articles online. But it’s worth revisiting the topic from an SEO perspective.
While Google has made big improvements in Flash indexing, here are 7 compelling reasons why search engines and Flash still don’t mix.
12. Don’t use <iframe> elements
Type: Indexing Importance: 2/5 Difficulty: Medium Total time: It depends
While iframe HTML tags have their uses, it’s best to stay avoid using them.
Google can technically crawl links in iframes, but not without serious problems. So unless you have a solid web-design background and/or need to pull content from your own domain to show on other pages, consider hiring a web-designer to rebuild your site properly.
Further reading:
- Using iFrame: SEO and Accessibility Points (Search Engine Journal)
- The iframe Dilemma (Boostability Blog)
- How iFrames (Don’t) Affect SEO (Fusion Inbound)
13. Don’t use obtrusive ads, annoying popups or useless splash/intro pages
Type: User engagement Importance: 3/5 Difficulty: Easy Total time: It depends
Snippets from the 60+ Photography website mistakes guide:
Most people hate intros of any type: flash animations, slideshows etc., anything that blocks from reaching the main navigation and homepage content.

Especially annoying are intros that can’t be skipped (easily or at all). Most of the times when this happens to me, I immediately close the site, I feel that the site owner doesn’t really respect my time, trying to force me to view something.
Splash pages can theoretically serve many purposes (selecting site sections/language, making announcements, displaying ads etc.), but none of them justify blocking the user from getting to the initial content.
While it’s understandable why Google would penalize sites with too many ads, the most important SEO implication comes from user experience.
All of those things can be displayed in a less intrusive way in between the content blocks (a sidebar, a top bar, a slide-in popover if you must, language flags, audio symbol with the sound turned off by default).
If you are keen on adding an intro for an important announcement, at least make sure the main menu is visible, and/or there’s a clear way to skip or close the intro.
Google picks up on all the small site engagement signals (time on site, bounce rate, pages per visit etc.) and “values” your website accordingly.
Further reading:
- Splash Pages: Do We Really Need Them? (Smashing Magazine)
- 8 Web Design Flaws that Can Ruin your Site’s SEO (Seo Hacker)
- Top Design Mistakes That Will Destroy Your Website’s SEO (StraightNorth Blog)
14. Use canonical URLs to avoid duplicate websites
Type: Indexing Importance: 4/5 Difficulty: Easy Total time: 10 min.
Canonicalization is a mouthful, but it’s very important for SEO. And although it can be used for more advanced SEO things, here’s the most important thing:
Your website should not show up both as www.johndoe.com and johndoe.com (with and without “www”) because they can be considered identical websites by Google (and punished for “duplicate content”).
If that’s the case for your website, the solution is somewhat simple:
- Decide how you want your site to show up (I prefer with “www” in front)
- Redirect one to the other
- If using WordPress, just go to Settings > General and update both the “WordPress Address (URL)” and “Site Address (URL)” fields accordingly.
- You can also add the proper “301 redirect” from one to the other in your hosting administration panel (instructions).
- Set it as the preferred domain in your Google Search Console account
Further reading:
- Canonicalization (Moz)
- A Guide to Canonicalization for WordPress (WPMU DEV)
15. Display pretty permalinks
Type: Indexing Importance: 3/5 Difficulty: Easy Total time: 2 min.
Ever visited a WordPress site and saw this type of URL?
http://www.johndoe.com/index.php?cat=183&mode=ugly&var=264a2qw7zaa
If your site does this, don’t take it personally but please know that you have ugly permalinks! There, I said it. :-) What are you going to do about it?
If using WordPress, you’re just a few clicks away from turning them into things of beauty:
http://www.johndoe.com/galleries/location/amazing-image/
Just go to Settings > Permalinks and set it to “Day and name” or “Post name”.
If you’re using PhotoShelter or other image management platforms, everything’s already taken care of: the URL actually contains SEO-valuable info taken from the image’s IPTC info, so Google has something more to “chew”, which is great.

Leaving Google aside for a moment, pretty permalinks are also great for users who like to share your content (they either copy-paste the URL from the browser address bar into a page or email somewhere or they share it on their social media profile): a nice-looking link is more inviting, you’ll simply get more visits. Aaaand we’re back to Google: a good user experience gets noticed and helps your site rank higher in search results.
Further reading:
- WordPress SEO URL / Permalinks considerations (Yoast)
- SEO Friendly URL Structure for WordPress (WPBeginner)
- Advanced WordPress SEO: Permalink Changes & Multilingual Implementation (Moz)
- The Ultimate Guide to WordPress Permalinks (ManageWP Blog)
16. Use a good SEO plugin
Type: Misc, WordPress Importance: 5/5 Difficulty: Easy Total time: 10 min. + Ongoing
If you‘re not using WordPress on your site, skip this.
One of the most acclaimed plugins is “Yoast SEO”, so I definitely recommend giving it a try. It’s what I’m using for this article as well.
For starters, it allows you to define your title & meta description tags for all pages and posts on your WordPress site. But there’s a lot more stuff the plugin does behind the scenes, including generating and submitting a sitemap for you (mentioned above).
This excellent article will teach you how to configure all of the advanced settings in the Yoast plugin.
17. Optimize your page titles
Type: On-site Importance: 5/5 Difficulty: Medium Total time: 1 hour
In short, <title> tags define the page and are used by search engines in search results previews. They are also displayed by browsers (usually as the tab title) and used by social media for sharing snippets.

This is not to be confused with an actual headline you add as text on a page (which can be different from the title tag and has its own SEO importance). The SEO title is defined in the source code like this:
<head>
        <title>Accurate and concise page description | Brand Name</title>
</head>
Best practices for optimizing your site’s title tags:
- Dedicate some time to write unique titles for all your main site’s pages. No need to force keywords in there, just try to accurately describe that respective page.
- If you do use keywords in the title, placing them in the beginning gives them more power. Also important for people scanning search results, they notice early words first.
- Branding text (“John Doe Photography”) usually goes last, preceded by a pipe character (“|”) or a dash to separate it from the rest of the title.
- Refrain from using repetitive/boilerplate titles, Google will appreciate it.
- Length-wise, limit yourself to around 50-55 characters. Anything more usually gets truncated in search results.
- When possible, adding modifiers can help you rank better: 2015, review, best etc.
On a lighter note, the longest <title> tag I’ve seen was 327 characters long included the photographer’s name 4 times and had a ton of comma-separated keywords. A perfect keyword stuffing example.
Further reading:
- Title Tag (Moz)
- Review your page titles and snippets (Google Search Console Help)
- Title Tags & SEO: 3 Golden Rules (Search Engine Watch)
- Page Title Tag Best Practice for Google (hobo Internet Marketing)
18. Optimize your page meta descriptions
Type: On-site Importance: 5/5 Difficulty: Medium Total time: 3 hours
Similar to the <title> tag, the meta description can be defined in the source code like this:
<head>
        <meta name="description" content="Short paragraph describing the page contents. Ideally this is unique and no longer than 300-320 characters."/>
</head>
It is highly important for how search engines “understand” the page and for gaining clicks from search results pages.
The common mistake is to try to cram the meta description with keywords, hoping it will help with SEO. Google is not using it as a ranking factor, so that’s a false expectation. Instead, the best thing you can do is to focus very little on keywords and instead simply compel the reader to click and find out more. The small SEO benefit (from including keywords) is dwarfed by not sparking user’s interest and not getting their click.
Let’s explore the best practices for meta descriptions:
- Write for humans, not search engines. Convince them the page is worth a click, and do it honestly.
- Keep it shorter than 158 characters (including spaces). If you make it longer, it will get truncated in search results. On mobile, Google displays a maximum of 120 characters.
- Once again, don’t repeat meta description, don’t use boilerplate text, don’t end with branding copy here too (“Description… | John Doe Photography”).
- Don’t use non-alphanumeric characters (especially quotes) to prevent meta descriptions from being cut off. (Single quotes are OK)
There are times when Google won’t display your meta description in search results, and instead decide to use small snippets from your page content. This has two possible causes:
- Your meta descriptions need to be improved; they weren’t considered good enough by Google, especially when they don’t accurate describe the page content.
- The search query better matches some other parts of your content. Google knows best.
Touching on this last point, some people decide not to define any meta description whatsoever, basically letting Google choose whatever snippet is most relevant for the search query. This is a valid strategy. So my recommendation is this: if you can write compelling and honest meta descriptions, do it, it will yield the best results. Otherwise, let Google extract it from the page content as needed.
Further reading:
- Big SEO news: you can now write longer SEO meta-descriptions (ForegroundWeb)
- Meta Description Tag (Moz)
- Meta Description Magic: Think Less about SEO & More about Click-Throughs (KissMetrics)
- How to Write an Effective Meta Description (Yes, They Still Matter) (HubSpot Blog)
- How To Write A Meta Description That Gets Click-Throughs (Search Engine Land)
19. Stop using keywords meta tags
Type: On-site Importance: 1/5 Difficulty: Easy Total time: 5 min.
This one’s easy, but I still see people doing this, so I had to mention it.
Search engines have been ignoring keywords meta tags for years, so using them aggressively these days could only hurt your site or even get it flagged as spam. Simply remove them from your site.
Displaying IPTC keywords on image pages is a whole nother deal. More on this later.
Further reading:
- Google does not use the keywords meta tag in web ranking (Google Webmaster Central Blog)
- Reasons Why You Should Stop Using Keywords Meta Tag (Cohlab)
- The myths behind meta keywords (SemRush)
20. Build a compelling “About” page
Type: On-site Importance: 3/5 Difficulty: Medium Total time: 1 hour
While the “About” page is a great place to include valuable content for search engines, it’s even more important for building trust with your audience (which in turn becomes an SEO signal).
Although this page rarely shows up in search results on its own, it’s probably the second most visited page on a website, with big SEO value, especially if your photography website Homepage is more image-heavy (like a full-screen slideshow).
Check out my in-depth article on this topic:

The complete guide to photography “About” pages explores all the main details that go into creating a great “Bio” page, including tips on writing your SEO title and meta description and quality examples from photography websites. Set some time apart to read it fully and improve your “About” page.
21. Add some text to your homepage
Type: On-site Importance: 2/5 Difficulty: Medium Total time: 1 hour
OK, you’re a good photographer, and you want to convey that by displaying your images. And not just anyway, but maybe with a full-screen impressive slideshow on the Homepage, because that creates the most visual impact.
That is partly true, but you’re also shooting yourself in the foot with regards to SEO. That’s because “letting your photos speak for themselves” might work with humans, but not with Google.
SEO titles, meta descriptions and image ALT tags help, yes, but your should also consider adding at least a small paragraph of text in there. If not for Google, then just for first-time visitors wanting to quickly know what the site is all about.
And if still keen on your image-heavy Homepage, here are a couple of strategies:
- Compromise: huge slideshow/images at the top, text at the bottom (“below the fold”).
- Compensate: make sure your other main site pages make up for it, text-wise.
Further reading:
22. Add niche keywords in your website copy
Type: On-site Importance: 4/5 Difficulty: Medium Total time: A few hours
To start with, I recommend reading about long-tail keywords in Moz’s Beginner’s SEO guide (chapter 5) (scroll down to the section titled “Understanding the Long Tail of Keyword Demand”).
Let’s put things into perspective:
If you’re stuffing the phrase “Boston fine-art photographer” throughout your site, hoping that will rank you higher for this local search, your efforts might be in vain. It’s a highly competitive phrase, and you run the risk of over-doing it and being penalized by Google.
If, instead, you write your website copy more responsibly, and your tens/hundreds/thousands of images contain “long-tail” phrases in their metadata, you’re much more likely to build a sustainable photography business. (“Fine-art print of autumn foliage in Boston”, “Boston town hall – fine art print”, “Children playing soccer in Boston public square” etc.)
Adding such niche keywords is the solution to the long-tail SEO strategy. Focusing only on top phrases, you miss up to 80% of the search traffic.
Some ideas to get you started:
- get very specific about the image contents (type, date, location, subject, style, color)
- use synonyms to avoid duplicate phrases
- use tools like http://keywordtool.io/ or Google’s Keyword Planner for inspiration
Trying this shift in SEO strategy (from popular phrases to multiple niche phrases) should lead to more variety and more search engine visibility.
Further reading:
- Why Long Tail Keywords Are SEO Gold (GetResponse Blog)
- Why focus on long tail keywords? (Yoast)
- How to Find Long Tail Keywords (BackLinko)
23. Use HTML heading tags (but only one H1 tag per page)
Type: On-site Importance: 4/5 Difficulty: Easy Total time: 1 hour
You should ideally wrap page headlines in H1 tags (and sub-headlines throughout the page in H2/H3 tags):
<h1>This is the page headline</h2>
WordPress and other platforms allow defining heading tags very easily in its visual editor:
 WordPress does this automatically (depending on your theme), but it’s useful to double-check (by reading the theme documentation or simply right-clicking on the headline and choosing “Inspect element”). Heading tags usually also come with proportional font-sizes.
But this doesn’t mean that you should use an H1 tag wherever you need larger text, which would have a detrimental effect on your SEO. Styling text is done with CSS.
And never use more than one H1 tag per page, that would be over-optimization. It’s perfectly fine to use several H2 and H3 tags to break up the content into separate sections though.
Further reading:
- How To Use H1-H6 HTML Elements Properly (hobo Internet Marketing)
- How to Use Heading Tags for SEO (WooRank Blog)
- The heading structure for your blog (Yoast)
- How Important is an H1 Tag for SEO? (Search Engine Journal)
24. Add date info to blog posts (Last updated, Last modified, Published on…)
Type: On-site Importance: 1/5 Difficulty: Easy Total time: 10 min.
Let’s take a quick look back at a Google search result:

The date is automatically picked up by Google from the post‘s date in the byline.
Google loves fresh content. So posting dates (publish date or, better yet, last-modified date) in blog posts is a great way to make your search results more enticing.
Google also automatically gets post dates from the XML sitemap you submit, but adding dates as text in your themes helps too.
Further reading: Why You Should NOT Remove Dates from Your WordPress Blog Posts (WPBeginner)
25. Simplify your site’s footer
Type: On-site Importance: 2/5 Difficulty: Medium Total time: 1 hour
The footer is supposed to be just a nice ending to a page, a small please with contact info and maybe a few navigation items to help users browse to a new page.
Instead, it is often over-optimized and it becomes a dumping ground for a lot of content that doesn’t fit elsewhere in the site.
Here are some common mistakes being made:
- links to (too) many galleries
- keyword-stuffed “About” snippets
- a full sitemap
- many graphics (Flickr/Instagram widgets, client logos)
- comma-separated keywords
Instead, the footer is a good place for:
- Links to a few of the main pages
- Contact info (at least a clickable email)
- Address/location
- Copyright info
This great article from Kiss Metrics says it all:
The only type of footer optimization that you should do is not to do it.
KissMetrics – How to Avoid Over-Optimizing Your Website
26. Reduce site-wide links
Type: On-site Importance: 2/5 Difficulty: Medium Total time: 1 hour
This goes hand-in-hand with my footer notes above. Site-wide links are commonly present in footers or blog sidebars (using “Blogroll” widgets).
Google is obviously taking a rational approach: more (duplicate) links lose a lot of their SEO value. So it makes no sense to link to friend or industry sites in your blog sidebar, those links are heavily disregarded. You’re simply “encouraging” people to leave your site instead of making them stick around your site longer.
Let’s look at it from another way too: on a single blog post, do those sidebar links relate to the topic at hand? Most likely they’re not, so it might make more sense to place them only once on the Homepage, or to remove them altogether.
Further reading:
- A Little Knowledge Is A Dangerous Thing – The Dumb Practice Of Site Wide Links (SEO Sherpa)
- SiteWide BackLinks : Good or Bad for SEO? (ShoutMeLoud)
- Penguin: The Sitewide Link Slayer (RewindSEO)
27. Disable (or prevent indexing of) some unnecessary WordPress archives
Type: On-site, WordPress Importance: 3/5 Difficulty: Easy Total time: It depends
Out of the box, WordPress comes with a lot of taxonomies: daily/monthly/yearly, category, tag, author archives. If all of these exist and are indexed by Google, they could be seen as duplicate content (and therefore hurt your SEO).
Here are some recommended settings for the Yoast SEO plugin:
- Titles & Metas > Other tab
- Sitewide meta settings > Subpages of archives > noindex
- Sitewide meta settings > Use meta keywords tag > Disabled
- Titles & Metas > Post Types tab
- Media > Meta Robots: index
- Titles & Metas > Taxonomies tab
- Tags > Meta Robots > noindex
- Format > Meta Robots> noindex
- Titles & Metas > Archives tab
- Author archives > Disabled
- Date archives > Disabled
Further reading:
- WordPress SEO – The Definitive Guide To Higher Rankings For WordPress Sites (sections 3, 3.1, 3.2) (Yoast)
- No Indexing WordPress Taxonomies: Do or Don’t (Search Engine Journal)
- The Advanced Guide to SEO – Chapter 04: WordPress (QuickSprout)
28. Avoid keyword stuffing or “black-hat” SEO practices
Type: On-site, off-site Importance: 4/5 Difficulty: It depends Total time: It depends
When you start learning some magic spells and tricks (aka the power of SEO), aren’t you tempted to also experiment with black magic? :-)
Don’t try to “game” the system. Yes, you know who you are!

Don’t force keywords into your content. Repeating certain phrases in all your page titles or gallery names is frowned upon. You should instead craft your text so that it always reads naturally.
Don’t use invisible texts. Search engines are becoming really smart, they can detect if you set the text color to be the same as the background in order to hide keyword-heavy texts from users.
Don’t buy links. Purchasing links to your site from link farms has already gotten out of hand a few years ago, it can now get your site banned from search engines. Let your incoming links grow organically!
A more comprehensive list of outdated SEO practices can be found here:
🦖 “Dinosaur” SEO tactics: stop wasting time on outdated SEO tactics and instead focus on what Google now cares about
Further reading:
- Hey mister SEO, what’s up with the black hat? (SEO Hacker)
- Beginner’s Guide to SEO – Chapter 9: Myths & Misconceptions About Search Engines (Moz)
- The Inconvenient Truth About SEO (Smashing Magazine)
- Exploring the Dark Arts of SEO: Search Engine Optimisation Part 1 & Part 2 (Liz Pearce)
- Black Hat Optimization – The Dark Side of SEO (Verda Design)
- SEO-Optimized Web Content: How Do You Optimize Without Overdoing It? (SocialMediaToday)
29. Avoid using overly difficult or spammy text, use natural language instead
Type: On-site Importance: 3/5 Difficulty: Medium Total time: It depends
First of all, don’t blog only for SEO purposes.
Even if you’re working hard to optimize your posts for Google’s eyes, make sure you’re also writing quality content for humans (great storytelling, personal recommendations, honest opinions). Stuffing your blog posts with keywords can make them “smell” of spamming, you risk alienating your audience.
But it’s also a matter of increasing your text readability (to appeal to a larger audience):
- breaking up text into shorter paragraphs
- adding sub-headings where appropriate
- increasing font-size and line-height
- using free readability level checking tools
Otherwise, if Google find’s your page to have a high user reading level, your site will sometimes be marginalized.
Further reading:
- Copywriters for your photography website & 10 tips on improving your own writing (ForegroundWeb)
- Better Readability = Better SEO (Hello SEO Copyrighting)
- The importance of readability in SEO (BoastingBiz)
- What is Readability for SEO & Online Readability Calculator (ShoutMeLoud)
- SEO Copywriting: How To Write Content For People and Optimize For Google (Neil Patel)
30. Make your website mobile-friendly (responsive) and confirm it with Google
Type: On-site, Mobile Importance: 5/5 Difficulty: Hard Total time: Up to a few weeks
I’m sure you’re aware of the current trends towards smartphones and tablets, more and more people are browsing website when on the go (or when standing still, on their sofa, on their tablet, for convenience).
Your website should not force mobile users to have to pinch and zoom, and that’s where responsive sites come into play. When being viewed on a small screen, the layout and content of the pages adapt to the screen size, resizing and repositioning elements as needed to create a good experience.

This is especially important for photography websites, which should automatically resize images to fit the screen size of the user’s device, and still keep it interactive (ex: swipe to change images).
 To make things even more important, Google recently started displaying a “Mobile-friendly” label to responsive search results on mobile devices. This provides a great signal for users that they’ll have a good browsing experience, and Google is rewarding that.
A responsive site provides a great browsing experience for your users, and Google is rewarding that!
There aren’t any simple shortcuts you can take to make your site mobile-friendly, it’s something you should consider investing in a web-designer for, or at least test your website with the free tools below.
Once you do make your website responsive, and have confirmed it Google’s free tool, make sure Google Search Console also no longer lists any pages as having errors.
Mobile-friendliness testing tools:
Further reading:
- The SEO of Responsive Web Design (Moz Blog)
- Mobile-Friendly Websites (Google Developers – Mobile Guide)
- Varvy Mobile SEO (“Mobile SEO Articles” section)
- 4 SEO Benefits of Responsive Web Design (Search Engine Journal)
- Google’s Gary Illyes Discusses Mobile as a Ranking Factor (StoneTemple Consulting)
In 2015, Google announced it will soon start penalizing non mobile-friendly websites:
- Google May Penalize Non Mobile-Friendly Sites (Ryan Allen on Medium)
31. Optimize your site for first-time visitors
Type: On-site Importance: 3/5 Difficulty: Medium Total time: 2 hours
Only a small percentage of your website visitors are returning users, people who are already aware of your work and have the patience to read your content carefully.
The large majority of your traffic is most likely made up of first-time visitors, with a short attention span. They don’t sit down to fully explore a website, they just quickly scan it (in various predictable patterns) to see if it fits their needs.
That’s why overwhelming them with too many options can, in fact, lead them away.
A great place to start would be this post on how to simplify your website and only emphasize the key elements on a page (while removing the “fluff”): Embracing minimalism in your photography website

Let’s explore some ideas to optimize your site for new visitors:
- Simplify your navigation
- Simplify your homepage (especially the area above the fold) and provide clear “paths” into your site areas
- Avoid splash screens or auto-playing music (users hate them!)
- Provide easy access to your contact info (more tips here)
- Have clear call-to-action buttons (always guide the user to a next piece of content)
- Include a quick statement paragraph on the homepage (a quick description of what the site is all about, to avoid any confusion)
- Display fresh content (“Recent blog posts”, “Recent galleries”)
Further reading:
- What the highest converting websites do differently (KissMetrics)
- The first rule of web design (Seth Godin)
32. Reduce bounce rates
Type: On-site Importance: 4/5 Difficulty: Hard Total time: 2 hours
When a user lands on your website, Google “notices” if they bounce back to search results, or instead they start browsing through your site.
PhotoShelter’s SEO Guide for Photographers excellently covers this topic:
Google defines a “bounce” as a visitor who looks at the first page of your site and does not click to any other pages (i.e., exits after seeing that one page and presumably deciding your site’s content does not match their search interests.) Your bounce rate for search traffic should go down if your search terms are effectively driving relevant traffic. In terms of targeting an optimal bounce rate, […] it is widely quoted that an average bounce rate across all websites is 40%, and from our experience with a lot of photographer websites, anything under 50% or so and you are probably doing OK.
But bounce rate can vary depending on the type of photography and the type of traffic you’re generating. For example, celebrity/red carpet photography sites tend to have relatively high search engine-based traffic, but it’s not necessarily qualified buyers who are seeking it. […] A high bounce rate, in this case, isn’t indicative of bad content – it’s merely a symptom of having popular content with a broad (consumer) audience.
Optimizing bounce rates obviously comes down to having a clean and modern website design, a site that increases user engagement (through useful internal links, calls-to-action, well-written copy etc.).
Some of the main bounce causes are:
- once again, splash/intro pages & auto-playing music
- very long paragraphs
- poor headlines
- keyword-stuffing (getting un-targeted visitors through irrelevant keyword searches)
- broken links
- slow websites
- poor design or not mobile-optimized
Further reading:
- What is Bounce Rate, And Should Photographers Care? (Tiffinbox – great article)
- How to Decrease Your Bounce Rate (QuickSprout)
- 19 Simple Tips to Reduce Your Website’s Bounce Rate Today (VentureHarbour)
- Bounce Rate Demystified (KissMetrics)
- Dwell Time: Does This Ranking Factor Really Live Up to the Hype? (aHrefs)
33. Increase your site’s usability
Type: On-site Importance: 3/5 Difficulty: Medium Total time: 2 hours
Photographers are sometimes overly-concerned with the visual aspects of the site, at the expense of usability. Important areas of the site should be accessible in as few clicks as possible.
Visitors should find it intuitive to navigate the site, so here are a few best practices:
- the menu should be placed either on the top or the left side
- whatever the location, the menu should be in a consistent place throughout the site
- a quick way to get back to the homepage should always be present (usually through a “Home” menu item, or by clicking on the logo)
- the site should require as few steps as possible to get to your desired destination (contact page, image level, purchase page etc.)
- no splash/intro pages, no unnecessary clicks (how many times have I mentioned this already?)
- easy ways to navigate through images (keyboard navigation is a bonus), and to return to gallery/collection pages

 Don’t just rely on people using their browser back/forward buttons. Help them navigate through the site with links back to parent galleries/categories.
And don’t forget to gather feedback from other people testing your site (either directly or on a global level using Google Analytics), it can be very insightful.
Notes on menu items: Carefully consider the actual words you use in your navigation. When browsing websites, people instantly recognize familiar names for navigation links. Your site should, therefore, avoid using weird names for menu items, they only slow down users in taking a decision, they hurt the website’s usability. One of the most frequent mistakes is calling your Contact page something like “How to reach me/us”. Some people link to a Services page using “What we do”. Always try going for simple one-word navigation links, and browse around for website examples to see what other people are using.
Notes on menu dropdowns: try to keep them as few as possible, they are usually annoying to visitors and they also make people skype the top-level menu options, reducing the visits to your more important pages in the site.
Notes on image thumbnails: in rare cases, photography gallery pages only allow clicking on the text underneath each thumbnail (usually the image title or filename). Make sure your entire thumbnail is clickable on your site, not just the text. It’s a visual medium, people expect to be able to click the image directly, it’s a larger target for the mouse pointer.
Further reading:
- Beginner’s Guide to SEO – Chapter 6: How usability, user experience & content affect search engine rankings (Moz)
- Usability Mistakes to Avoid When Using Photos in Your Website (Design Instruct)
- SEO and Usability (Nielsen Norman Group)
34. Improve your site’s speed/performance
Type: On-site Importance: 5/5 Difficulty: Hard Total time: It depends
Regular visitors hate slow websites. Photo buyers hate slow sites. Google does too. There’s a clear pattern here. Site speed is an important reliability factor in SEO algorithms.
Most of the time, you’re locked into the page structure provided by your CMS, and the same goes for web server optimization. But there are a few things you can do to reduce website load times.
First of all, don’t underestimate the importance of a solid web hosting provider. If your server is slow, it doesn’t matter how you build your site, you could be waiting for several seconds before the first byte is received. I’ve had a good experience with Siteground so far if you’re looking for an inexpensive solution (and unless you’re relying solely on hosted image management solutions like PhotoShelter).
If you’re using WordPress, caching can really improve your site’s load speed. Using a plugin like WP-Rocket does all the hard work, the principle is simple: it creates copies of your dynamic content as HTML pages (among other things) and serves them to browsers instead of having to generate all the content for each visitor.
Other possible elements impacting page load speed:
- quality of the source code (badly-coded templates/themes)
- flash elements
- audio/video
- slow servers
- page redirects
- non-optimized images (see below)
- too many scripts
- some social media buttons
Investing in a quality theme and/or a professional web-developer to make your website fast will pay dividends, in the long run. A big part of your visitors will leave the site if it takes too long to load, even if have quality content.
Free site speed testing tools:
- Google’s own PageSpeed Insights (or as a Chrome extension)
- Pingdom Website Speed Test
- WebPageTest
- GTmetrix
Further reading:
- A Beginner’s Guide to Website Speed Optimization (Kinsta – excellent overview)
- Pagespeed (Varvy – a ton of great articles explaining Google’s PageSpeed results)
- How Load Time Affects Google Rankings [infographic] (QuickSprout)
- How to Make Your Site Insanely Fast (SingleGrain)
- Performance Unleashed: How To Speed Up WordPress Load Times (DIYthemes)
- 11 Low-Hanging Fruits for Increasing Website Speed (and Conversions) (ConversionXL)
- How to Fix a Slow WordPress Site (and get A+ scores and a load time under 430ms) – 25 WordPress Speed Optimization Tips (BitsFromBytes)
35. Optimize your photos
Type: On-site Importance: 4/5 Difficulty: Medium Total time: A few hours
Besides taking an overall look at your site performance, also check how big your images are being displayed on the site, and only upload images of that size.
I’ve seen this happen very often: browsers struggle to load full-resolution images simply to then resize and display them at 1000 pixels or less. Make sure your images are exported/uploaded at a good size (as dictated by their display size on the site), saved as JPG (instead of PNG, TIFF, RAW), and a decent compression level (60-70% quality, as low as you can without starting to introduce too much noise, it’s a compromise).
There are obvious exceptions for this: if you plan on offering prints and image licenses on your site, those need to use your high-quality full-size images (with security measures in place). But your site should be able to automatically generate smaller images just for display purposes, and only provide the high-quality images when actually needed.
Compress your images online with Imagify (or their WP plugin), or use software like ImageOptim (Mac) / PNGGauntlet (Win) or others.
Another time consumer sometimes is having too many images in a bad slideshow. You need to make sure that you slideshow loads images dynamically as you navigate through it. Some websites still need to wait to load all images before starting the actual slideshow, which is obviously a bad thing.
Further reading:
- Image Optimization: How to Rank on Image Search (Search Engine Watch)
- How to Optimize Images for Better Search Engine Rankings (DIYthemes)
- 7 Ways to Optimize Image Files for SEO (Business2Community)
- 10 Must Know Image Optimization Tips (Shopify)
- 6 Tips on Image SEO (TopRank Blog)
36. Optimize website graphics
Type: On-site Importance: 2/5 Difficulty: Medium Total time: A few hours
Besides your photography, your website template surely uses small graphics/files for design. These can also impact site speed.
Three very small social media icons can take more time to load than one single slideshow image (because it’s not just a matter of total file size, the browser has to make a bunch of server requests for files, and these take up precious time).
A good read is Google’s “Image optimization” guide. It provides everything you need to know about optimizing site graphics: file formats, compression types, vector graphics, retina display implications etc.
You should also check out: How to optimize images for website performance: image sizes, compression, tools & testing
37. Always add image ALT tags
Type: On-site Importance: 4/5 Difficulty: Easy Total time: It depends
If you have no experience with HTML, here’s what you need to know: whenever an image appears on your site, it uses the following source code format:
<img src="domain/path/filename.jpg" alt="important text here" />
That value inside that ALT tag is the main point of interest for Google when looking to “understand” an image (the others being the filename and the text around the image on the page). Search engines don’t have the practice of looking into IPTC/EXIF information yet, so you can see why the ALT tag is important if you care about SEO.
Browsers also usually display the ALT tag in a tooltip when hovering over an image. The (recommended) maximum length of the ALT text is 16 words though this is hard to test. And no comma-separated keywords here, it should either be descriptive/helpful or none at all.
Your website platform should ideally automatically fill-in the ALT tag using one of the main IPTC fields (like PhotoShelter does), or at least allow you to easily define it (like WordPress does).
On the topic of ALT tags, here’s an informative snippet from Google:
Not so good:
<img src="puppy.jpg" alt=""/>
Better:
<img src="puppy.jpg" alt="puppy"/>
Best:
<img src="puppy.jpg" alt="Dalmatian puppy playing fetch">
To be avoided
<img src="puppy.jpg" alt="puppy dog baby dog pup pups puppies doggies pups litter puppies dog retriever labrador wolfhound setter pointer puppy jack russell terrier puppies dog food cheap dogfood puppy food"/>
Filling alt attributes with keywords (“keyword stuffing”) results in a negative user experience and may cause your site to be perceived as spam. Instead, focus on creating useful, information-rich content that uses keywords appropriately and in context.
Further reading:
- How Many Words In ALT Text For Google (hobo Internet Marketing)
- The basics of using Alt Text for SEO (Econsultancy)
- Writing Great Alt Text (About.com Tech)
- The Importance of ALT Attributes (9Clouds)
- How to Write ALT Text and Make Your Images SEO Friendly (KnownHost)
38. Add keywords in image filenames
Type: On-site Importance: 2/5 Difficulty: Easy Total time: It depends
Sure, you might be displaying IPTC fields for your visitors. But what about filenames?
Search engines cannot understand the contents of an image (yet), all they can understand is that your image contains a… DSC0001. Or they find out that in your photo there’s a person called… IMG0004. Nobody will search for that on Google.
It’s true that image ALT tags, along with IPTC information, are responsible for properly describing an image. But filenames simply provide extra info about your images to search engines.
And if your images do show up in Google search results, filenames are sometimes used as description snippets, thus being of value to the users too.
So just like with ALT tags, it makes sense to add descriptive keywords into the filename, instead of leaving the default camera-assigned ones (DSC0001.JPG).
Filename best practices:
- try to make it no longer than 3-4 words
- separate words using dashes (spaces are fine too, but no underscores)
- skip stop words (he, she, the, a etc.)
A side-effect of having keyword-rich filenames is that images become more likely to show up in Google Image search results.
Google’s “Image publishing guidelines” reinforce the importance of image filenames:
“The filename can give Google clues about the subject matter of the image. Try to make your filename a good description of the subject matter of the image. For example, my-new-black-kitten.jpg is a lot more informative than IMG00023.JPG. Descriptive filenames can also be useful to users: If we’re unable to find suitable text in the page on which we found the image, we’ll use the filename as the image’s snippet in our search results.”
Further reading:
- How to optimise your images for SEO (Econsultancy)
- The Ultimate Guide for Web Images and SEO (Internet Marketing Ninjas)
- Image Optimization – File Name Important? (Moz Q&A Forum)
39. Display image IPTC metadata
Type: On-site Importance: 4/5 Difficulty: Medium Total time: It depends
Not only does this affect SEO, but how are people supposed to always know the contents depicted in your photos?
Image captions provide real value to both humans & search engines:
- specific person names, objects, locations, date, time of day (where applicable)
- scientific names
- storytelling (your travel experiences, problems you had, obstacles you overcame)
- abstract meanings (depending on the type of photography)

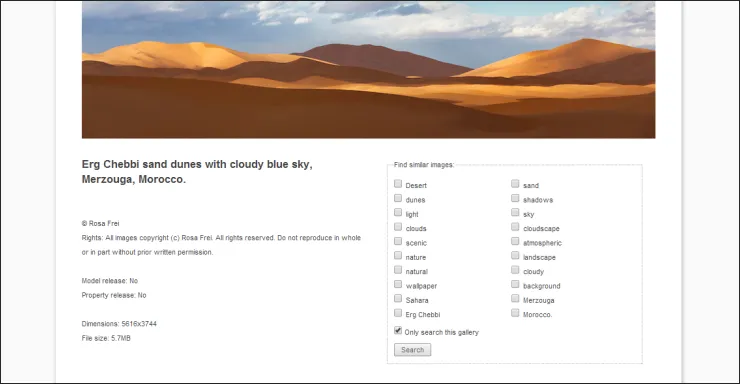 Rosa Frei displays image IPTC details (as well as searchable keywords) under enlarged photos.
Well written captions can make people relate to your images. Same thing applies to gallery descriptions: it’s a great way to inform visitors about that specific group of photos.
The first step is obviously to add IPTC info to all your images in your preferred image management software (like Adobe Lightroom), before uploading them to your site. Displaying that IPTC info is only the second step and should simply be a matter of enabling it in your CMS of choice.
For example, PhotoShelter allows you to very easily display image captions and keywords on their respective image pages, while their internal “SEO Grader” tool explains their importance well:
- “A descriptive caption is a crucial element of an image’s online display. Not only does a caption help educate your site visitors about an image, it also tells the search engines what they’re looking at.”
- “Keywords are one of the most efficient ways to tell a search engine about your images. A search engine cannot determine on its own what is displayed in an image, so it’s up to you to provide text, such as 5-20 keywords per image, to place it in context. Important note: Search engines will penalize you from displaying the same word too many times on one page, so use discretion – never “keyword bomb” your images.”
- “Proper keywording is very beneficial to image-level SEO. The first step is to ensure that an image has 5-20 keywords assigned in its metadata. The second is to ensure that this set of keywords is displayed on the page alongside the image. It’s not enough to have keywords assigned to images if these keywords do not appear on the screen.”
Looking into the future, Google is starting to understand what an image actually contains, it looks quite interesting. But until it does it well (and that’s a big “if”), manually-entered metadata is all you can do to help your SEO cause.
40. Optimize your site for local search
Type: On-site Importance: 4/5 Difficulty: Medium Total time: 2 hours
I big trend in the SEO world is toward local search.
![]() Both mobile and desktop search results are starting to display location-specific results (even when there was no location being asked for as a keyword), by using your device’s IP address or your networks public location.
Both mobile and desktop search results are starting to display location-specific results (even when there was no location being asked for as a keyword), by using your device’s IP address or your networks public location.
So if your photography business has a local component, optimizing your site to tailor to that specific area is a must.
Here are places where you can include location info (city, state, country):
- SEO title tag and/or meta description
- The first heading on the homepage
- In your About and Contact pages (!)
- In gallery titles/description
- In image ALT tags and IPTC metadata
As locations-specific queries become more popular, your location can sometimes make all the difference for clients staring confused at Google search results.
Further reading:
- Everybody Needs Local SEO (Moz Blog)
- Optimizing Your Website for Local Search (Moz Local)
- Local SEO In 2015 – Look At The Big Picture (Search Engine Land)
- How To Optimize Your WordPress Site For Local Search (ElegantThemes)
41. Add your business info to Google My Business (for more local search exposure)
Type: Local Importance: 4/5 Difficulty: Medium Total time: 2 hours
Firstly, let’s start with WHY.
When doing some geographic-specific searches (like “melbourne photographer”), Google sometimes displays a huge Google Maps component above the standard results.

It’s obviously great if you can reach that list, and it all starts with you creating a free Google My Business account.
If you’ve previously heard about “Google Places for Business” or “Google+ Pages”, they’re all the same, they’ve been re-branded into “Google My Business”.
Extra tip: if you have an embedded Google map on your Contact page, be sure to point it to your actual Google My Business location directly.
Further reading:
- Google My Business – Be found
- Get Your Business To 100% In Google My Business (Search Engine Land)
- Cracking Local SEO: A Guide to Google My Business in 2015 (FirstPageSage)
- 5 Things Most People Forget About Local SEO (Neil Patel for Entrepreneur)
- Local Business SEO: Everything You Need to Know (Pam Aungst)
42. Use relevant anchor texts when linking back to your site
Type: Off-site Importance: 5/5 Difficulty: Hard Total time: 2 hours
Before we dive into link building strategies (the “bread and butter” of SEO), it’s important to first note the importance of anchor texts.
Whenever you add a link somewhere, the HTML language allows specifying which text actually gets turned into the link. This has some great uses:
- You can link inline text to other website, without writing their entire URL there
- You describe the link destination to Google (!)
Using my site as an example, there’s a huge difference between:
You can read photography web-design articles here.
… and:
Go here to read photography web-design articles.
It’s an over-simplified example, but you get the idea. In the first example, Google understands that the website is about… “here” (although it tries to understand a little more of the entire sentence, not just the anchor text). In the second example, there’s a lot more context in the anchor text.
So whenever you have links pointing back to your site, try to improve their anchor text, it can greatly improve yourSEO in the long run.
Further reading:
- Anchor Text (Moz)
- Anchor Text and SEO (wikiweb)
- A Basic Guide for Anchor Text (ahrefs Blog)
- Link Building: Anchor Text Optimisation Best Practices (BuiltVisible)
43. Get quality links back to your site
Type: Off-site Importance: 5+/5 Difficulty: Very Hard Total time: Ongoing
The quantity and quality of incoming links to your website (“backlinks”) are huge SEO factors. Link building is the hardest (and most powerful) parts of SEO.
Search engines like Google consider backlinks as “votes of confidence”, therefore ranking you higher for the keywords that fit the bill.
It makes sense to start with any photography-specific profiles pages you can control. Think of all the sites you have profiles on:
- associations
- memberships
- contests you took part in
- vendor/partner sites
- trade groups
- forums
- communities
- event sites you’ve shot for
- guest posts you’ve written
- basically, anywhere your name/brand shows up online
Inside each of those profile pages, you can most likely place a link to your own site.
Besides these self-created links, and excluding buying links from the equation, you’re left with the natural process of gaining links over time. There’s no shortcut here, no quick tip you can employ. It’s just a matter of creating worthy content day in and day out, and your ability to raise awareness about it.
Tracking inbound links can be done in Google Search Console or using tools like MOZ Open Site Explorer.
Further reading:
- Beginner’s Guide to SEO – Chapter 7: Growing Popularity & Links (Moz – highly recommended)
- What Are Backlinks in SEO and What Are The Advantages of Backlinks? (ShoutMeLoud)
- The Most Creative Link Building Post Ever (PointBlankSEO)
- 19+1 Ways To Cleverly Get Natural Backlinks To Your Blog (BloggerTipsTricks)
- 59 Amazing Organic Link Building Articles (CognitiveSEO)
44. Get your social media profiles to link back to your site
Type: Off-site Importance: 2/5 Difficulty: Easy Total time: 20 min.
I don’t need to tell you that social media is crucial these days to running a successful business. And especially a photography business (since photography is such a powerful medium).
But you should never lose sight of the big picture: your own website is the core of your business.
“You’ve got to think about the big things while you’re doing the small things, so that all the small things go in the right direction.” – Alvin Toffer
Social media profiles are just marketing hubs, allowing you to spread the message, to promote your work, and to bring people back to your site.
With this in mind, make sure that all your social media hubs link back to your website:

And while you’re at it, also set up an effective email signature.
Further reading:
- The Top 5 Off-Page Optimisation Factors (Search Engine People)
- Beginner’s Guide to Social Media (Moz)
- Matt Cutts: Facebook, Twitter Social Signals Not Part of Google Search Ranking Algorithms (Search Engine Watch)
45. Clean up spam links to your site
Type: Off-site Importance: 2/5 Difficulty: Medium Total time: It depends
Sometimes you will get low-quality backlinks (from hiring shady SEO companies to buy cheap links for you, or from trying to get unnatural links yourself). Google is obviously against spam links of any kind, so, once in a while, you should clean up your backlinks.
Tools to find bad backlinks:
What to look for:
- Low-quality sites with a big number of external links
- Links with over-optimized anchor texts (comma-separated keywords)
- Site-wide links (bad sites linking to you in a footer or sidebar)
What to do with them:
- Contact the site owner and request to remove those specific links (this should always be your first action though it can be a daunting task sometimes)
- Use Google’s link disavow tool
Further reading:
- A new tool to disavow links (Google Webmaster Central Blog)
- How To Clean Up Bad Links and Establish Trust With Link Vendors (Search Engine Journal)
- Clean up your bad backlinks (Yoast)
- How to Protect Your Website from Negative SEO (KissMetrics)
46. (Don’t be afraid to) link to external sites
Type: On-site Importance: 2/5 Difficulty: Easy Total time: Ongoing
There is this myth of losing “SEO juice” if you link to external sites, making people not link to other sites (or just link internally). SEO doesn’t work like that. Not to mention that you’re not serving your audience/readers best, you’re hiding links from them for your own perceived benefit.
You can see that after each SEO action in this article, I’ve included a “Further reading” section, linking to relevant quality articles online. Is it helpful to you? If so, why would Google “punish” my site’s SEO, it makes no sense.
Linking to other authoritative sites is an indication that you respect other people’s content, and it becomes a trust signal to Google (a trust signal for your own website too!)
So when you’re blogging, don’t be afraid to link to other sites, and instead focus on producing your best content.
Further reading:
- External Links (Moz)
- Importance of Outbound Links for SEO (ShoutMeLoud)
- High Quality External Links: What They Are and Why You Need Them (Cohlab)
- Why and How to Use External Links (About.com Tech)
- How Does Linking to Another Website Affect SEO? (Blue Corona)
47. Double-check your entire site for spelling, grammar, semantics, demo content & outdated contact info
Type: On-site Importance: 2/5 Difficulty: Medium Total time: Ongoing
Properly testing your site before launching it should not be neglected. But even afterward, it pays to do a monthly review of the entire site and check your new/recent content for mistakes (new blog posts, new gallery descriptions, etc.) and double-check your contact info.
You’d be amazed how many photographers changed their phone number but then forgot to also update their site’s contact info.
And don’t just try to review it yourself, you need “outside” people to give you feedback. A fresh pair of eyes can spot a lot of small details. A site tester (even if it’s just a friend or relative) can give you some interesting insights (“I was confused on that page, I didn’t know where to contact you…”) or report weird things (“Everything was fine in Safari, but I tried your site in Firefox and the homepage was all messed up…”).
Regularly check your site for:
- spelling, grammar, semantics (I’m a fan of Grammarly)
- outdated contact info
- outdated Bio details (“X years ago”)
- outdated copyright info (“Copyright 2013”)
- broken navigation (removed a page recently?)
- dummy/test content (the words “Lorem ipsum” should not be present)
Further reading:
- SEO Advice: Spell-check your web site (Matt Cutts Blog)
- Google: Grammar Does Not Impact SEO & Search Rankings (Seroundtable)
- Does Spelling and Grammar Effect SEO? (Moz Q&A Forum)
48. Scan and fix broken links
Type: On-site Importance: 3/5 Difficulty: Medium Total time: Ongoing
Broken links send users to non-existing web pages, so they’re obviously important to not have. They can be bad for your site’s usability, reputation, and SEO. If you find broken links in the future, take the time to replace or remove each one.
For some info and tools on this topic, here’s an article I wrote a couple of months ago: Broken link checker tools for photographers

For inbound links (“backlinks”), you can use the Google combo: Search Console (Index coverage) and Analytics (to spot visits landing on a 404 error page), and then you can fix them by either asking the site owners to a link update or adding a redirect yourself.
Further reading:
- How To Capture Broken Inbound Links (Search Engine Land)
- How to Capture Broken Inbound Links: 3 Simple Steps (Teknicks)
- How to Find and Fix Broken Links (to Reclaim Valuable “Link Juice”) (ahrefs)
49. Test your site with (free) SEO tools
Type: General Importance: 2/5 Difficulty: Easy Total time: Ongoing
After all your hard work on the site’s SEO, it’s time for testing.
You should spend some time going through some of these tools and figure out which ones give you the most valuable insights, depending on your goals. You’d be amazed how much difference a good tool can make, displaying SEO data in new creative ways.
Fortunately, there are a number of free tools that can help you reach your SEO goals. They all have slightly specific purposes, but building a good arsenal of powerful tools will make you master the game of SEO.
Here are some great round-up posts of free SEO tools:
- 50+ completely free SEO tools with no credit card or registration needed (Sustained Surge – great comprehensive list)
- 21 Simple and Free SEO Tools to Instantly Improve Your Marketing (Buffer Blog)
- The 100 Best Free SEO Tools & Resources for Every Challenge – Interactive (Moz Blog)
- The Best SEO & Marketing Tools Ever (Saijo George – huge interactive list)
- My 15 Favorite Free SEO Tools (LunaMetrics)
- SEO Tool by Varvy
And here’s a list of the best premium tool used by SEO experts: The Best SEO Tools: 143 SEO Experts Cast Their Votes (Plus Leaderboard)
And last but not least…
50. Schedule to regularly track your SEO efforts and adapt your strategies
Type: Planning Importance: 2/5 Difficulty: Easy Total time: 30 min.
If you’re serious about your website, measuring your SEO progress on a regular basis is a must (I recommend at least once a month). SEO is not a one-time effort.
“Celebrate any progress. Don’t wait to get perfect.”
– Ann McGee Cooper
What I like to do is to bookmark all pages (including social media accounts, news sites, and anything else that I need to check on a regular basis), group them all in a folder (your browser most likely allows bookmark folders) and then open them all at once. Like a regular website “health” check.
Here are relevant metrics/reports you can keep an eye on:
- Overall stats inside Google Analytics
- Total number of visitors (Dashboard)
- Visitors via search (Acquisition > All Traffic > Channels)
- Keywords used to find you (Acquisition > All Traffic > Channels & Acquisition > Search Engine Optimization > Queries)
- Relevant reports inside Google Search Console
- Google searches
- “site:domain.com” (number of indexed pages)
- same thing in Google Images
- MOZ Open Site Explorer (Inbound Links, Just-Discovered etc. All of them!)
- Majestic (backlinks and many other reports)
- Reports from your preferred SEO tools mentioned above
Further reading:
- Beginner’s Guide to SEO – Chapter 10: Measuring & Tracking Success (Moz)
- Best Practices for Measuring SEO Success (Search Engine Journal)
- How to measure SEO results – the 5 KPIs you need to know (FirstPageSage)
- 10 Quick & Dirty SEO Success Metrics (Search Engine Land)
- How to Measure SEO Success (Search Engine Watch)
- How to measure SEO success in Google Analytics (Ranking Elite)
Conclusion
There are obviously many things you can do to maximize your site’s SEO and ultimately get found online & improve your photography business. If you’re not leveraging SEO to get more website traffic, now is the best time to start!
And if you only took one main idea from this article, it is this: search engines are looking more and more closely at user experience signals across the web, at how users browse your website, instead of relying only on keywords and links to rank websites. SEO is no longer focused solely on keyword-rich copywriting but on providing the best possible browsing experience for your target audience (with a fast, mobile-friendly and honest website).
Build an amazing photo website that people love, and Google will follow!
Hope you find this SEO guide useful. I’d be very grateful if you’d help it spread by emailing it to a friend or sharing it on your social media profile. Thank you.
Here’s to better photography websites!
– Alex
If you’re overwhelmed, you can hire me to work on your site’s SEO. My in-depth SEO review (exclusively for photographers!) includes everything comprehensive on-site SEO work and 1‑on‑1 consulting to help move your website hire in the rankings.