Contents
Let’s shine some light on the mistakes that top photographers often make on their websites. With straight-forward ideas and many examples & resources, this guide will get your site on the right track. Fix as many mistakes as possible to achieve photo website mastery!
So… 60 mistakes? That many? Oh yes, there are many things to fix.
Your online presence is the core of your photography business, it’s probably the main way you can attract new (and better) clients. But there are over one million photography sites & blogs out there today, so you really need to set yours apart.
In my years of experience with building photo websites, I have gathered a comprehensive list of mistakes being done and put them together in this free guide for you. It’s my attempt to help you improve your photography website and make you more successful, covering all the most important details you need to know. You can draw a lot of inspiration from it, helping you use your website and a marketing engine for your photography products and services.
All ideas are short and to-the-point (I didn’t want to bore you with nonsense) and come with their own resources and solutions to help you eliminate any site problems. While some issues require very simple fixes, as you’ll probably see, it won’t be an easy task. You’re probably already doing some mistakes that will require you to rethink your whole strategy and to get a complete picture of your work, of your goals for the website. And that’s a great thing!
The guide covers topics like image quality, SEO, design, navigation, keywords, testing, eCommerce, blogging, and much more. And it’s all laid out in a simple fashion, with many examples and resources for inspiration and for a better understanding of the issues.
If you have a photography website, don’t let it damage your business!
So let’s get started…
Mistake #1: Long or ugly domain name
Importance: 3/5 Difficulty: Medium Total time: A few hours for domain name change and SEO precautions
The best practice, when you’re choosing a domain name for your photography business, is to try to keep it short and simple.
Too many people include hyphenated keywords in their domain
(best-photography-in-the-world.com), but that’s really bad. The very small SEO benefit you get from using keywords in the domain name is nothing compared to the zero branding value you have: it’s hard to remember, it lacks credibility.
The other side of the coin is that, if you just use your own name as the domain, you’ll probably not get any unsolicited traffic from search engines, people are not likely to search “John Doe” on Google without first hearing of you.
So a good middle ground might be to include the word “photography” after your name. If you do that, don’t use any hyphens, put it all in one word. But if that becomes too long, consider just sticking with your name, or replacing “photography” with just “images” or “photos”, although this is less common.
If you’re branding under a business name, then, by all means, use that brand name as the domain (if available): it will be easier to market and generally conveys more trust.
One of the best ways to get new domains (and usually cheaper and with better support than GoDaddy) is NameCheap.
You can now also start registering a .photography domain (instead of .com). For example, you could get something like: www.johndoe.photography (that’s it, notice it’s not johndoe.photography.com, no more .com)
And there are others as well: .photos, .graphics, .camera, .lighting, .gallery
The jury is still out on whether photographers will start taking advantage of these new top level domains. More on this topic here.
Further reading:
- 12 Rules for Choosing the Right Domain Name [The Moz Blog]
- How To Choose Domain Names For SEO [SEOBook]
Mistake #2: Using free platforms
Importance: 5/5 Difficulty: Hard Total time: It depends, it's like starting from scratch
 I’m talking about sites like Blogger, Tumblr or WordPress (the free .com version, not to be confused with the popular self-hosted software from wordpress.org which gets installed on your own domain).
You get what you pay for :-)
They are free for a reason, they’re often targeted at amateurs, so by using them, you let out this impression of your work too. They might be OK for side projects or sharing bits of content with friends, but your main work deserves the right tools.
Using a self-hosted site allows you to build the website under your own domain, gaining more control & an important SEO advantage. And WordPress is definitely the most popular self-hosted site platform.
Further reading:
Mistake #3: Using free themes/templates
Importance: 5/5 Difficulty: Hard Total time: It depends, at least a few hours, sometimes days
One of your main goals is to differentiate yourself from the other gazillion photographers out there, to show your personality. Using a free (or a very cheap) website template (without even customizing it) puts you in the same bucket with many other photographers using the same one.
Sure, if you’re just starting out, you might not have the proper budget to hire a quality photography website designer to build your great website, so you opt for the cheaper option. Or you’re just looking to “test the waters” first, to see what feedback your images get. But it’s like an investment, what you put into your website is proportional to what you get out of it later.
Photography website platforms and templates are improving, but you have to be careful when choosing, so they act as a good foundation for your work and avoid most of the mistakes in this guide automatically.
For a more complete photography management solution, PhotoShelter is arguably one of the best in the business, used and trusted by thousands of photographers.
If you’re using WordPress, definitely don’t just stick with the default WP themes that come pre-installed. If you need a quality WordPress theme, the best place to look into is definitely ThemeForest (this link automatically filters for WP themes & “photography” and sorts by popularity).

But you can’t just install a theme and call it a day, customizing it is very important. Successful photographers have worked on making their websites unique. If you need a recommendation, The7 theme is the most customizable WP theme I’ve used so far.
The most professional solution will always be to have a bespoke website, custom-built to your specific needs. The chances of you reaching your objectives with a custom site are much higher, it can really set you apart.
Mistake #4: Flash websites
Importance: 5/5 Difficulty: Hard Total time: It depends, you need a new site from scratch
You probably already know this.
You lose all iPhone/iPad visitors and any recognition from search engines (unless you have an HTML site mirror, which has its own set of concerns). Not to mention affecting your site’s load speed.
Are you willing to trade all that for some eye-candy?
Sure, flash used to be a cool thing, and allowed for some very interesting designs. But HTML5 and CSS3 have advanced so much lately that there’s no longer a reason no to use them to create amazing photo websites (with all the bells and whistles you want).
If you’re relying on fancy flash animations to make your images/galleries look good, you should look inward, you probably need to work more on your craft (both actual photography skills and portfolio image selection skills). You need to reach a point where the images are interesting without fancy animations, sounds, zooms, fades etc.
Further reading:
- Flash and SEO – Compelling Reasons Why Search Engines & Flash Still Don’t Mix [The Moz Blog]
- 8 reasons to avoid Flash (or Silverlight) like the plague when designing a website [Antezeta]
- 5 Reasons Why You Should Avoid Flash on Your Website [Digital Doughnut]
- Flash and SEO: Like Oil and Water [Search Engine Guide]
Mistake #5: Ugly permalinks
Importance: 1/5 Difficulty: Easy Total time: 1 min.

Each page/gallery/image on your photography site should have its own unique & permanent URL (aka “permalink”).
Ever visited a WordPress site and saw this type of URL?
https://www.johndoe.com/?p=1469
If your site does this, don’t take it personally, but please know that you have ugly permalinks! There, I said it. What are you going to do about it?
If using WordPress, you’re just a few clicks away from turning them into things of beauty:
https://www.johndoe.com/galleries/location/amazing_image/
If you’re using PhotoShelter, everything’s already taken care of: the URL actually contains SEO-valuable info taken from the image’s IPTC info, so Google has something more to “chew”, which is great.
Leaving Google aside for a moment, pretty permalinks are also great for users who like to share your content (they either copy-paste the URL from the browser address bar into a page or email somewhere, or they share it on their social media profile): a nice-looking link is more inviting, you’ll simply get more visits.
A special note on AJAX sites or some types of slideshows: make sure that the sub-pages or slideshow images have their own unique URL, usually using anchor tags:
www.johndoe.com/portfolio#image23
Otherwise, people coming to your site via shared links will end up on the homepage, or will only start from the first image in the slideshow. An intelligent permalink takes people directly to what you were seeing initially.
Mistake #6: Not redirecting the root domain to the “www” sub-domain
Importance: 1/5 Difficulty: Easy Total time: 10 min.
Problem 1: Some photographers only set up their site to work with the “www” subdomain, leaving their root domain non-functional.
Here’s what you see when accessing some sites without “www” in front:


Problem 2: If not properly set-up, the hosting provider can allow both non-www and www URLs to display the same site
(https://johndoe.com and https://www.johndoe.com).
In Google’s eyes, these are two separate sites, leading to potential penalties for duplicate content, so it should be avoided at all costs.
Luckily, the solution for both problems is the same: you need to add a 301 redirect from one to the other (usually from the root domain to the “www” sub-domain, although there are people who prefer the first option).
If you have FTP or cPanel access, add this to your .htaccess file:
RewriteEngine on
RewriteBase /

RewriteCond %{HTTP_HOST} !^www. [NC]
RewriteCond %{HTTP_HOST} ^(.+)$ [NC]
RewriteRule ^(.*)$ http://www.%1/$1 [R=301,L]
For GoDaddy domain-only users, steps are described here & here. And if you’re using a Microsoft IIS server instead, read instructions here.
Mistake #7: Slow load times
Importance: 4/5 Difficulty: Hard Total time: A couple of hours
 Regular visitors hate slow websites. Photo buyers hate slow sites. Google does too. There’s a clear pattern here.
Most of the time, you’re locked into the page structure provided by your CMS, and the same goes for web server optimization. But there are a few things you can do to reduce website load times.
First of all, don’t underestimate the importance of a solid web hosting provider. If your server is slow, it doesn’t matter how you build your site, you could be waiting for several seconds before the first byte is received. I’ve had a good experience with HostGator so far if you’re looking for an inexpensive solution (and unless you’re relying solely on hosted image management solutions like PhotoShelter).
If you have a WordPress site and you need top quality (and speed), go for WPEngine.
Also check how big your images are being displayed on the site, and only upload images of that size. I’ve seen this so often: browsers struggle to load full-resolution images simply to resize and display them at 1000 pixels or less. Make sure your images are exported/uploaded at a good size, saved as JPG (instead of PNG, TIFF, RAW), and a decent compression level.
There are obvious exceptions for this: if you plan on offering prints and image licenses on your site, those need to use your high-quality full-size images. But your site should be able to automatically generate smaller images just for display purposes, and only provide the high-quality images when actually needed. Detailed instructions in this in-depth guide.
Tip: compress your images online with Imagify (or their WP plugin), or use software like ImageOptim (Mac) / PNGGauntlet (Win)
Another time consumer sometimes is having too many images in a bad slideshow. You need to make sure that you slideshow loads images dynamically as you navigate through it. Some websites still need to wait to load all images before starting the actual slideshow, this is obviously a bad thing.
If you’re using WordPress, caching can really improve your site’s load speed. Unless you want to invest in professional WordPress hosting providers, using a plugin like W3 Total Cache or WP-Rocket does all the hard work, the principle is simple: it creates copies of your dynamic content as HTML pages (amongst other things) and serves them to browsers instead of having to generate all the content for each visitor. It can also help integrate with a CDN for greater speed unless your site provider already does this.
Other possible elements impacting page load speed: flash elements, audio, slow servers, page redirects. Also, make sure you ask your web developer to follow performance best practices: using CSS image sprites, using a CDN when possible, replacing various graphics with CSS3 definitions, enabling caching, testing etc.
Further reading:
- 18 Image Compressors to Speed Up Your Website [Mashable]
- Google PageSpeed Insights
- Pingdom Website Speed Test
- GTmetrix
- WebPageTest
Mistake #8: Not mobile-friendly
Importance: 5/5 Difficulty: Hard Total time: It depends, you might need to change themes or rebuild your site
I’m sure you’re aware of the current mobile trends: more and more people are browsing websites when on the go (or when standing still, on their sofa, on their tablet, for convenience).
Your website should not force mobile users to have to pinch and zoom to browse it:

 Having to pinch & zoom is not a good browsing experience
That’s what responsive design aims to fix: when being viewed on a small screen, the entire layout immediately adapts to the device’s screen size, providing a sometimes-simplified but more enjoyable browsing experience.
Photography websites in particular need to be careful with how they resize photos to fit the screen size (like showing 2-3 images per row on a tablet, and 1 per row on a phone) and to take advantage of swipe gestures (while ignoring hover events). Not to mention taking retina displays into account (for displaying really crisp images).
Having a mobile-friendly website is no longer a simple recommendation, it’s a must-have. Otherwise, a big part of your site’s visitors will leave sooner, and Google will take notice.
Further reading:
Mistake #9: Splash pages or popups
Importance: 4/5 Difficulty: Medium Total time: 15-30 min.
Most people hate intros of any type: flash animations, slideshows etc, anything that blocks from reaching the main navigation and homepage content.

Especially annoying are intros that can’t be skipped (easily or at all). Most of the times when this happens to me, I immediately close the site, I feel that the site owner doesn’t really respect my time, trying to force me to view something.
Splash pages can theoretically serve many purposes (selecting site sections/languages, making announcements, displaying ads etc.), but not of them justify blocking the user from getting to the initial content.
All of those things can be displayed in a less intrusive way in between the content blocks (a sidebar, a top bar, a slide-in popover if you must, language flags, audio symbol with sound turned off by default).
If you are keen on adding an intro for an important announcement, at least make sure the main menu is visible, and/or there’s a clear way to skip or close the intro.
Further reading:
- Splash Pages: Do We Really Need Them? [Smashing Magazine]
Notice their very first paragraph: “Yes, sometimes we do. Should we use them? No, we probably shouldn’t. […] And users literally can’t stand them […]” - Q&A – January 2016 (my thoughts regarding popups)
Mistake #10: Music
Importance: 3/5 Difficulty: Easy Total time: 1 min.
Disable any auto-playing music on your site. Pleeeaase. Especially if you’re also violating the artist’s copyright.
Mistake #11: Cluttered design (especially the header)
Importance: 4/5 Difficulty: Medium Total time: Anywhere from 10 minutes to 3 hours

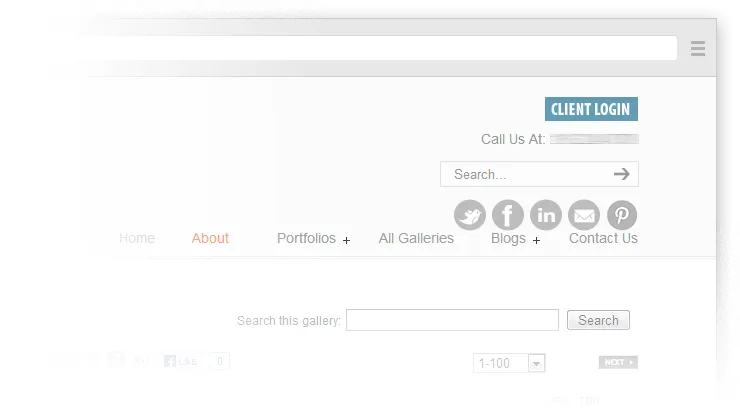 Too many elements grabbing for attention in this site’s header area, too crowded.
The header is probably the first thing that visitors see on your site, so it’s important to avoid too much clutter.
You need to create a good impression, so even if you offer a lot of content on your site, try to organize it in a simple way. Pushing too many items in the header might confuse people and tempt them to leave the site.
Normally, blocks of text and subscribe boxes should not be found in headers. You should instead leave the header as clean as possible, properly featuring the logo and navigation.
Overwhelming visitors with too much information can affect your results: people can get confused, click on a less important element or even abandon the site. Less is more.
Going for a clean design builds credibility, and doesn’t distract anymore from your calls-to-action.
White space is important too, letting your main navigation and important content breathe and attract enough attention.
Mistake #12: Old/outdated design
Importance: 4/5 Difficulty: Hard Total time: It depends, might be time for a full redesign

Too many photographers put in the effort of building a good website for themselves, and then make the mistake of leaving it on autopilot for a long time.
Would you do the same with a prints portfolio? I’m sure you’d be keen to refresh those images from time to time, as you skills & experience grow. So why no apply the same thought process to the design of your website?
Besides continually adding fresh content to the site, you should also evaluate how the overall design compares to other sites in your niche. The web-design world, with all its new technological advanced and design trends, might be leaving you behind.
If it’s been a long time, you might need a full re-design to make the most of what your site can do for your business. But most of the times, a few simple changes (modern fonts, different color scheme, updating a few graphics here and there, going more towards a flat design etc.) can really freshen up the entire site.
Add a website review to your yearly goals.
Mistake #13: Annoying, confusing or missing navigation
Importance: 5/5 Difficulty: Medium Total time: 1h
Photographers are sometimes overly concerned with the visual aspects of the site, at the expense of usability. Important areas in the site should be accessible in as few clicks as possible.
Visitors should find it intuitive to navigate the site, so a few best practices are in order here:
- the menu should be placed either on the top or on the left side
- whatever the location, the menu should be in a consistent place throughout the site
- a quick way to get back to the homepage should always be present (usually through a “Home” menu item, or by clicking on the logo)
- the site should require as few steps as possible to get to your desired destination (contact page, image level, purchase page etc.)
- no intro pages, no unnecessary clicks
- easy ways to navigate between images (keyboard navigation is a bonus), and to return to gallery/collection pages
And don’t forget to gather feedback from other people testing your site (either directly, or on a global level using Google Analytics), it can be very insightful.
A word on dropdowns: try to keep them as few as possible, they are usually annoying to visitors and they also make people skip the top-level menu options, reducing the visits to your more important pages in the site.
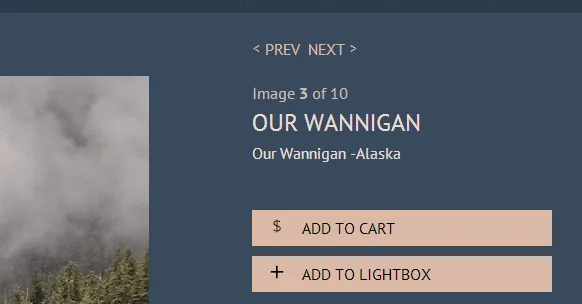
A word on thumbnails: in rare cases, photography gallery pages only allow clicking on the text underneath each thumbnail (usually the image title or filename). Make sure your entire thumbnail is clickable on your site, not just the text. It’s a visual medium, people expect to be able to click the image directly, it’s a larger target for the mouse pointer.

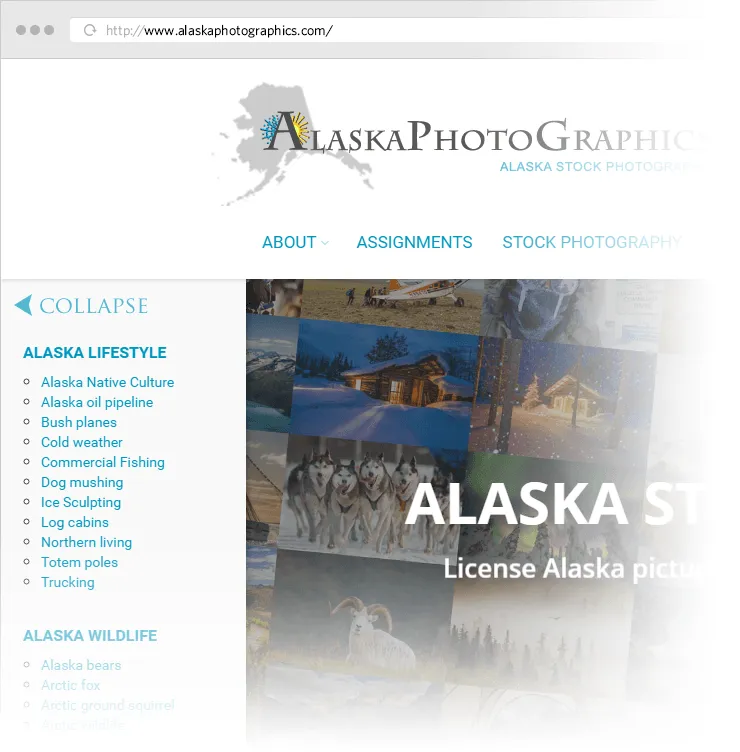 A creative example of displaying available galleries (too many to place in a menu dropdown): AlaskaPhotoGraphics uses a slide-in left sidebar throughout the site, closed by default.

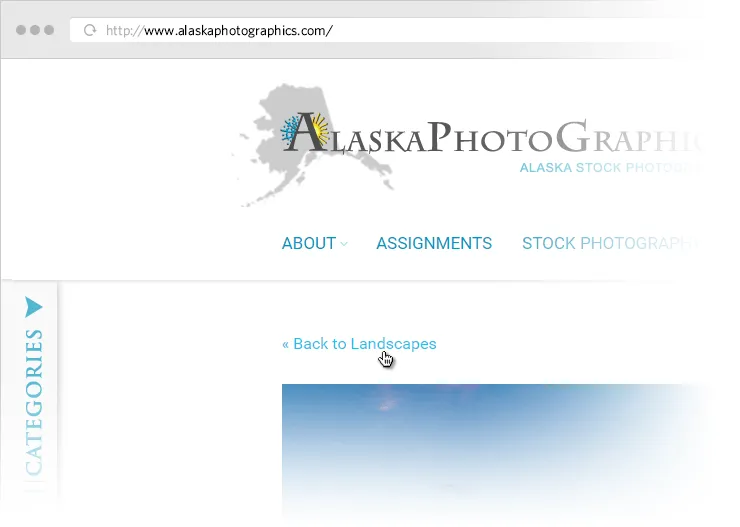 Don’t just rely on people using their browser back/forward buttons. Help them navigate through the site with links back to parent galleries/categories.
To learn more about improving your website’s navigation menu, check out my full guide:

Mistake #14: Unorthodox menu items
Importance: 2/5 Difficulty: Easy Total time: 10 min.
Carefully consider the actual words you use in your navigation. When browsing websites, people instantly recognize familiar names for navigation links. Your site should, therefore, avoid using weird names for menu items, they only slow down users in taking a decision, they hurt the website’s usability.
One of the most frequent mistakes is calling your Contact page something like “How to reach me/us”. Some people link to a Services page using “What we do”.
Always try going for simple one-word navigation links, and browse around for website examples to see what other people are using.
Secondly, the order of your menu items is also important. I recommend to always have “Home(page)” first, your main site page/section second. (If you don’t have a link to your homepage in the main navigation – because the logo helps with it – that most popular page link should sit first!).
“Contact” almost always sits last in the menu, that’s where people expect to find it.
This is all because people have an easier time remembering the first and last positions in a list, so that’s where you should first focus on. The rest of the links should usually be placed in the order of their importance to your site.
Further reading:
- Horizontal Navigation Menus: Trends, Patterns And Best Practices [Smashing Mag.]
- Efficiently Simplifying Navigation, Part 1: Information Architecture [Smashing Magazine]
- How to Nail Down the Perfect Website Navigation [HubSpot]
Mistake #15: Too many menu items
Importance: 3/5 Difficulty: Easy Total time: 10 min.
You’re probably sick of hearing that LESS IS MORE, but let me try to phrase it differently.
Take a look at the following navigation examples (actual screenshots from photo websites):


Wouldn’t you feel a bit confused when trying to browse a site like this?
Studies have shown that people are usually able to keep only 5-7 items at a time in their short-term memory, so you should ideally keep the number of menu items as low as that. Adding more than that only makes them less prominent, losing importance.
Here are some nice examples:


Further reading:
- Navigation menu best-practices for photography websites (with tips on how to reduce the number of menu items you have)
- Are You Making These Common Website Navigation Mistakes? [KISSmetrics]
- How to Avoid the Top 10 Website Navigation Mistakes [Webvanta]
Mistake #16: Being a Jack of all trades (having no target audience)
Importance: 5/5 Difficulty: Hard Total time: It really depends...
 If you take a look at the websites of successful photographers, you’ll notice that they feature just a few photo skills or categories, they don’t try to cover everything. It’s perfectly fine to be passionate about both travel photography and baby portraits, and you can indeed carefully feature them both.
In most cases, it makes sense to merge multiple websites into one, but listing galleries from all possible areas of expertise can only confuse people, making it hard for them to navigate through your images or list of services.
If you’re a beginner, you should eventually try to find a photography niche that you like, and create meaningful work for it. That’s what you can feature on your homepage.
Seeing a photography site with 10+ galleries from all fields of photography leaves the visitors asking “What is this guy/gal actually really good at?” Don’t make them ask, showcase (only) your best skills from the start.
And if you work is really split between 2-3 different areas, try clearly differentiating them on your site, or even creating separate landing pages for each one. Your job then is to lead each type of desired client/audience to the respective part of your site.
In case they really don’t go together, then by all means… get different domains and build separate websites. You’re spreading SEO value into different domains, sure, but your prospective traffic will get a better browsing experience.
Further reading:
- How to define your target audience & elevator pitch (and use them on your site)
- Having separate photography websites or merging them?
Mistake #17: Non-existent branding (or even missing a logo)
Importance: 5/5 Difficulty: Medium Total time: 1h min.
Whether you’re running a strong photography business or just starting out as a hobby, your website should have some sort of visual branding: a personalized logo, a color scheme, consistent fonts, repeating graphics etc.
Branding is a powerful way to get users to resonate with your work, to gain their trust.
If you’re using free website tools (like WordPress.com) and just doing absolutely no work to personalize the site or upload a logo, you’re giving out a bad impression of your work: “Hmm, it’s another no-name site.”
Since you are a creative artist, people expect you to have at least a decent amount of flair for graphics, for creating visual impact.
Yet nothing contradicts this more than having a website with no logo. Or where the logo is just a text-based representation of your name in a default font.
I’m not saying you need to spend money on a creative logo (although it definitely helps), but at least invest some time and effort into a unique logo, even if it’s just typographic. And don’t consider your logo as the all-mighty branding stamp-of-approval, you have to make sure the entire site follows a consistent look and create a great experience for your audience.
Here are some great examples of using consistent graphics throughout the site:


Further reading:
Mistake #18: Too much info
Importance: 2/5 Difficulty: Medium Total time: 30 min.
Being too verbose can make people stop reading your content. This applies to the About/Bio text, and any other text-based page on your site (instructions, list of services, FAQ, experience etc.)
Writing more doesn’t always output the best results, you should try getting a clear message across.
Many photographers write such a long biography text that they can’t really expect people to read it entirely. So how then can they convince those people to also contact them for a project?
It’s again a matter of quality vs quantity: stick to what actually necessary, be brief, focus on the main points.
If you do need to feature more content on the site, break it down into pages, and link to it.
For example, don’t list all your photo gear right in the biography text, simply mention it and add a “learn more” link pointing to a separate page (which doesn’t have to also sit in the main navigation). You’re simply asking permission to take users deeper into the site, you’re not putting it in their face from the beginning.
And always let the text breathe: break texts into paragraphs, add empty lines as needed, highlight important sentences, use header and sub-headers. A longer page is acceptable if it’s easy to skim through!
Mistake #19: No personality
Importance: 2/5 Difficulty: Medium Total time: 30 min.
Just like you’re trying to create your own photography style, you should definitely try to infuse some personality into your website, that’s what most successful photography websites are doing as well.
Your tools to do this? Design (especially colors, fonts & spacing) and (micro) texts.
In terms of design, making a website your own first requires figuring out things like:
- if your site will be under a personal name or a business name
- what your target/existing audience is
- how you want people to feel when coming to your site
- the mood needed for the site (joyful, classic, serious, funny, dark, modern, etc.)
This will inform you of the colors and types of fonts to use, to better match your style of photography.
Aside from design, words have the most power. Using the right tone can make all the difference in the world:
- using some humor
- digging up interesting stories about yourself
- being trustworthy and reassuring when mentioning your services
- having a (smiling) self-portrait on your About page
For more inspiration, look no further than this great article from Smashing Magazine: “The Personality Layer”.
Mistake #20: Creating confusion
Importance: 3/5 Difficulty: Medium Total time: It depends

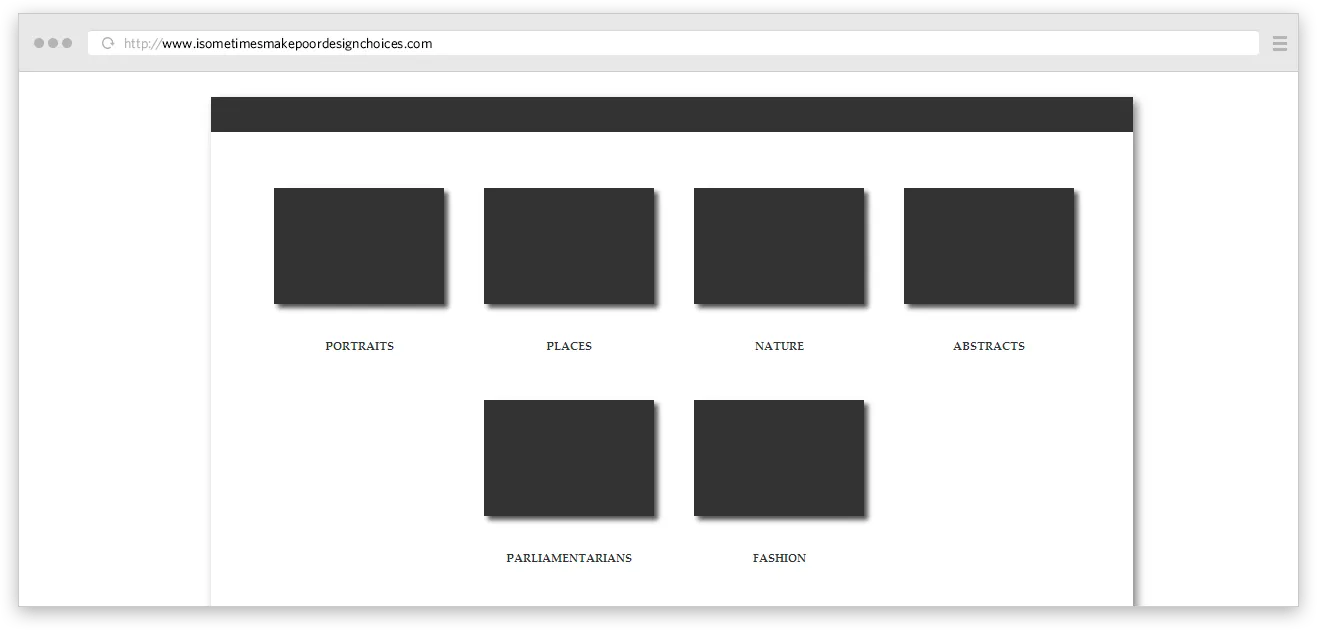 This photographer intentionally added gray boxes instead of gallery thumbnails on the homepage, so they function as “portals” into the content. Do you agree?
When building a custom website, the possibilities are endless. But with a larger degree of freedom comes… exaggeration.
There is a balance you need to master between being creative and going too far.
It’s perfectly fine to try to be different than everyone else, but you also need to make sure your audience understands you, that your website is still user-friendly.
So unless you have a lot of experience with building websites and agree to properly test your site (when breaking the rules), you’re probably better off sticking to the design best practices.
It can hurt to be too creative with:
- where you place your search box
- fonts (type, size & color)
- unorthodox menu item names
- too many links/options etc.
Mistake #21: Distracting backgrounds
Importance: 3/5 Difficulty: Easy Total time: 10 min.
When taking a great photo, you always pay attention to what’s in the background of your composition, making sure it’s not distracting in any way. So why not apply the same mindset for the website background?
You should try to avoid strong textures or image backgrounds, photos work really well on solid backgrounds (or with some very discreet textures).
You can see some examples in this other article I wrote, aptly titled “The case against background images in photography websites”.

When in doubt, stick with a solid white background. Black does indeed make the images pop more, but white text on a black background is usually less readable, hurting the eyes.
For an added elegant feel, try to just use shades of gray (either very light or very dark) instead of pure white or black. The difference is subtle, but the visual effect is great.
Whatever you choose as the background for your photography site, make sure there is enough contrast between it and the text color!
Mistake #22: Poor typography
Importance: 4/5 Difficulty: Medium Total time: 1-2h
Improving your site’s fonts is one of the best ways in which you can create a better the browsing experience.
Usually, it’s a 3-part process to make the text comfortable to read:
- Choosing the right font face (that matches your logo and the general look of your site)
- Setting a larger font size (16px or more)
- Setting an appropriate line-height (at least 1.5)
Font changes are usually done through the website editor or WordPress theme settings (or with a plugin like Easy Google Fonts).
For font inspiration (and how to pair them), check out these sites:
- https://hellohappy.org/beautiful-web-type/
- https://femmebot.github.io/google-type/
- https://bueltge.de/free-web-font-combinations/
Formatting is also important. Whenever you have long blocks of text (link in your bio or in blog posts), you need to break things up into shorter paragraphs, organize the content with sub-headings and bullet lists, and highlight the important words (in bold or italics).
Mistake #23: No clear call-to-action buttons
Importance: 4/5 Difficulty: Easy Total time: 30 min.
Once your visitors land on the site, they can either start browsing around randomly, or you can guide their actions using meaningful buttons/links (aka calls to action).
With this in mind, you should figure out what the main purposes of the site are. Do you want people to contact you via the Contact page? Would prefer them to subscribe to your newsletter or get your photography book?
Try to make it very clear to them, by prominently placing links to that page or section. Do this on your homepage or any other relevant pages in the site.
Want people to search images from your archive? Place a large search box right on your homepage.
For photographers selling prints or image licenses, the add-to-cart buttons on the image pages are great examples of this. They need to stand out and make themselves heard.

 Nice and clear action buttons on an image display page.
So for each page on your site, decide what your desired outcome is, and turn that into a powerful call-to-action. Just one or two, don’t give users a full “laundry list” of actions they can take.
Simplicity is key here, as this is not the place to try to be too funny or interesting. The words you use can have a big impact on the efficiency of your buttons/links, so try to keep it as straightforward as possible (ex: a search box should say “Search”, not “Start looking”, it’s what people expect). More CTA tips here.
Mistake #24: Hard-to-find search
Importance: 5/5 Difficulty: Medium Total time: Usually 30 min.
Let me start off by saying that not every photography website needs search functionality. If it’s just a portfolio-type website, showcase only your best work, visitors don’t really need to search for images.
So it’s intuitive, you need to offer search functionality when you have a lot of images and/or you want people to purchase them.

In this case, your search box must be as clear as possible, placed prominently on your site (depending on the purpose it serves). The best place to put it is towards the top of the page (usually towards the right too, like at the beginning of a sidebar), but make sure it doesn’t “get into a fight” with the main menu.
It’s a bad idea to hide the search box on a separate page or in a menu dropdown, people are a lot less likely to use it there, so it defeats the whole purpose.
And when I mean “hard-to-find”, it’s not just about position. Make sure it’s easily recognizable: has a box with borders, a good size input field, and a clear button that says “Search” (or has a magnifying glass icon, that seems to be acceptable these days). And don’t place it near other contact/subscribe forms on your site, it deserves its own space.
Further reading:
- Designing The Holy Search Box: Examples And Best Practices [Smashing Mag.]
- Search box placement: examples and best practices [Econsultancy.com]
- Does Search Need to be in the Upper Right? [User Interface Engineering]
Mistake #25: No slideshow controls
Importance: 2/5 Difficulty: Hard Total time: 10 min. if the slideshow is customizable
You can’t force people to view all your images, if that was the plan. In case visitors need/want to go through your images faster, they should be able to do that, it’s a lot better than them leaving the site out of frustration.
So make sure your slideshow include left/right arrows for navigation between images. This is the minimum.
Ideally, you can offer other controls as well:
- pause button (or auto-pause when the user interacted with the slideshow)
- full-screen button: photo buyers love this, it allows for a distracting-free experience, letting your images shine
- thumbnails (usually as a filmstrip at the bottom): allows for quickly jumping to other images
- image number (“01/23”)
- share functionality to help spread the word
- purchase button, or at least linking to the actual image page to make a purchase.
(This is important: if someone really like an image, he/she should have a quick way to purchase it, instead of having to manually look for it in your archive, after having seen it on a slideshow/portfolio.)

 Some slideshows have sharing and full-screen options

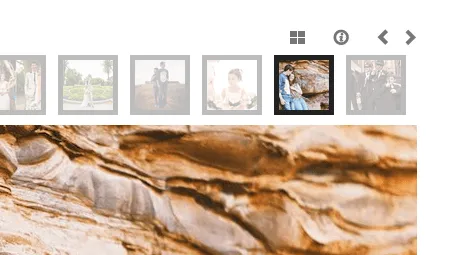 Other slideshows allow viewing small image thumbnails
By the way, your site gets bonus points for:
- hiding left/right arrows when not being used, displaying them again when hovering over the slideshow
- keyboard navigation between images

 This custom-built slideshow displays a purchase button on each slide (linking to that respective image)

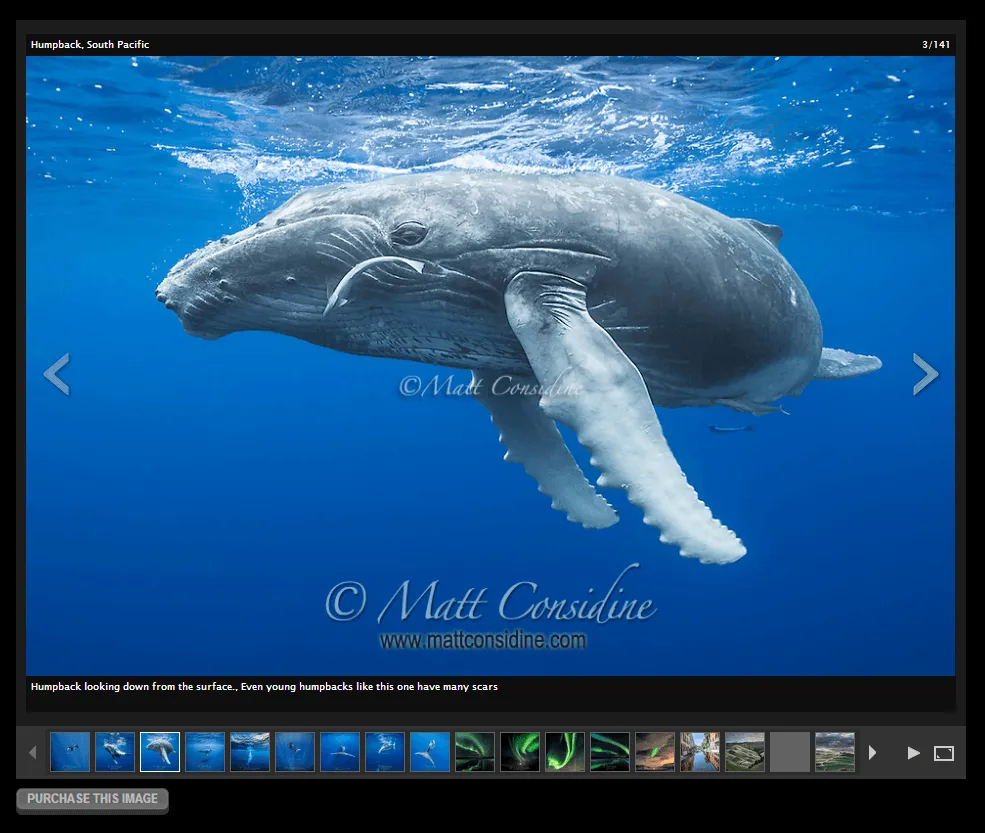
 A ton of slideshow features here: auto-play, left/right arrows, clicking on photo to advance, fullscreen view, image index, thumbnails, keyboard navigation, mobile-friendliness.
Mistake #26: Too many photos
Importance: 3/5 Difficulty: Hard Total time: Choosing quality over quantity requires a neverending curation process
It’s great to have a large image archive, covering a vast career of interesting projects. That’s not the point here.
With each gallery you put online, you should strive to only pick top examples of your work, for the most visual impact.
Too many photographers throw in almost all the images they have on a topic, including very similar variations of certain subjects. That’s only going to dilute the wow-factor, so you should definitely start getting more critical.
Focus on quality instead of quantity. 15-20 well-selected photos can impress a lot more than a large 100+ image gallery of closely-related shots.
Exceptions are worth mentioning here: stock photography archives, client/commissioned galleries, archive/backup folders.
And even if you have a lot of quality images to share, make sure you’re grouping them in a logical structure on your site. Most website providers allow creating nested galleries/folders. These do require extra clicks to open, but also simplify browsing decisions, leading to a cleaner experience.
If you’re committed to curating your online portfolio, start with this specific article:

Mistake #27: Images too small
Importance: 3/5 Difficulty: Medium Total time: 10 min. - 2h
In this day and age, all websites out there are becoming more and more visual, relying on powerful photos to help with storytelling. Limiting your images to 500-700 pixels creates less of a visual impact.

In terms of resolution, please remember that DPI/PPI is irrelevant for the web, you just need to concern yourself with the actual pixel dimensions.
You might also be afraid of image theft, and this is a reasonable thought. But this also hurts the experience visitors have on your site, not to mention that theft protection should be handled with a watermark. It’s true that watermarks sometimes negatively affect the visual impact too, but not as much as seeing images too small.
Try displaying images with a width of at least 1000 pixels whenever possible (while maintaining the aspect ratio, of course).

And you can go even bigger (full-width images) for portfolios or homepage slideshows. When you want to impress your audience, size does matter! No pun intended.
This also applies to thumbnails (usually on gallery pages): at the very least, try to display them at 150-200 pixels. This makes visitors more comfortable instead of sometimes having to squint and guess what the image contents are.
Mistake #28: Low-quality images
Importance: 5/5 Difficulty: Medium Total time: A few hours for re-exporting and uploading images to the site
Displaying mediocre images is obviously a bad thing, but that has less to do with your website, and more to do with your skills as a photographer, so we won’t cover that here.
From a technical point of view, if you don’t have too much experience with image management software (like Adobe Lightroom), you might make the mistake of exporting images at a low-quality JPG level, or sharpening your images too much (or not at all).
You should experiment with the JPG compression level until you come to a good compromise between visual quality and file size. You surely don’t need to crank up the JPG compression to 100%, and could probably be fine somewhere around 60-80%, this helps keep the file size done without too much of a perceivable difference.
Here’s some must-read material for photographers: How to resize, export & compress images for optimal website performance

A note on retina displays: If you really want to display high-quality images on your site and cater to the new high-resolution (“retina”) displays out there, lower the JPG compression slightly to keep the file size in control. This would indeed add more image noise, but retina images regain a lot of sharpening/clarity anyway.
Further reading:
- Usability Mistakes to Avoid When Using Photos in Your Website [Design Instruct]
- 5 Simple Things You Can Do to Make Your Web Images Pop [PhotoShelter Blog]
Mistake #29: Overly-cropped or stretched images
Importance: 5/5 Difficulty: Medium Total time: As long as it takes to fix your images
Your website might be causing this: some templates (or low-quality WordPress themes) can affect the aspect ratio of images, stretching them. This looks really bad. Other times, often seen in slideshows, images get severely cropped so they fit the container.

 Make sure your site doesn’t inadvertently crop or stretch your images.
Other times, often seen in slideshows, images get severely cropped so they fit the container. If your website has slideshows, try looking into the settings for it and disable and image “stretching”, or anything that can affect the image aspect ratio. You’re better off having your images cropped a little around the edges than getting them stretched unnaturally.
If we’re on the topic of slideshows, select the images and maybe even crop them beforehand, so at least you get a change to select the part of the image that’s relevant.
A note on weird thumbnails when changing WordPress themes: Once you upload images to WordPress, it automatically generates all the thumbnail sized required by your theme (Settings > Media page). But when you change themes, you also need to make sure you’re regenerating your thumbnails so they now adapt to the new theme requirements.
A note on square thumbnails: Some website templates display image thumbnails in a square format, cropping the images as needed. This is usually done to create interesting layouts, and is usually accepted. But make sure your images look fine this way, maybe select different gallery covers where the point of interest is in the center.
A note on very wide images/slideshows: With smaller slideshow heights, make sure you’re choosing panoramic images (or manually cropping them as needed). A couple of sites doing this to perfection:
A couple of sites doing this to perfection:


Mistake #30: Color-space problems
Importance: 5/5 Difficulty: Medium Total time: A few hours
 In case your camera is set to capture raw images, or shooting JPEGs or TIFFs in a wider color space (Adobe RGB, ProPhoto RGB), and you are familiar with color management and ICC profiles, be careful when preparing/exporting your images.
Browsers (usually) don’t pay attention to the color space of photos and assume it’s sRGB. Wider color spaces end up being displayed with less saturation and hue shifts.
So be sure to convert them to sRGB before using them on websites, and also try to embed a color profile (if not already there) for color-managed browsers.
MSTK_31.png: IRELLEVANT_IMAGE_FILENAMES.jpg
Importance: 1/5 Difficulty: Easy Total time: 1-2h
Sure, you might be displaying IPTC fields for your visitors. But what about filenames?
Search engines cannot understand the contents of an image (yet), all they can understand is that your image contains a… DSC54763.
Or it finds out that in your photo there’s a person called… IMG0004. Oh yes, if anybody will search for these words on Google, your site will show up on the first page, fantastic!
Sorry, maybe I put in too much sarcasm here.
It’s true that image ALT tags, along with IPTC information, are responsible for properly describing an image. But filenames simply provide extra value to your images for search engines.
And if your images do show up in Google search results, filenames are sometimes used as description snippets, thus being of value to the users too.
You can read more about this on Google’s page on Image Publishing Guidelines (see the section called “Give your images detailed, informative filenames”)
Mistake #32: No image captions or gallery descriptions
Importance: 3/5 Difficulty: Medium Total time: A few hours
Not only does this affect SEO, but how are people supposed to always know the contents depicted in your photos?
Image captions provide real value to both humans & search engines:
- specific person names, objects, locations, date, time of day (where applicable)
- scientific names
- storytelling (write about your experience taking those photos, problems you had, obstacles you overcame)
- abstract meanings (depending on the type of photography)

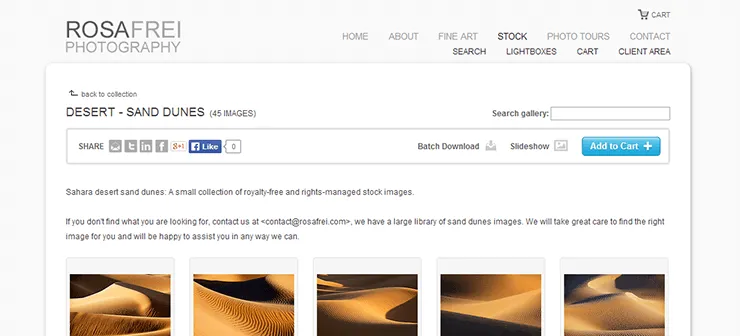 Rosa Frei displays a gallery description above the thumbnails…

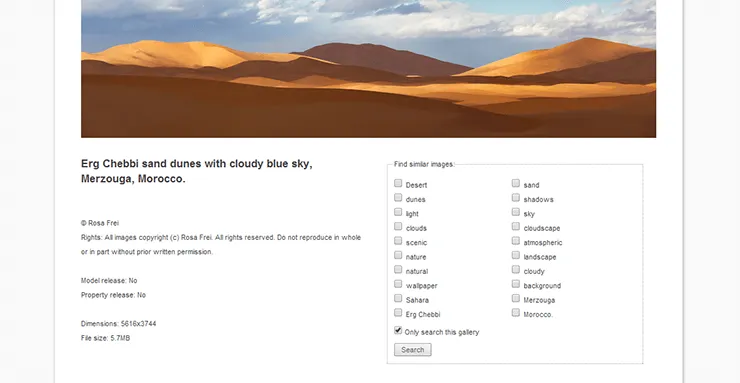 …and image IPTC details (as well as searchable keywords) under the enlarged photo.
Well-written captions can make people relate to your images.
Same thing applies to gallery descriptions: it’s a great way to inform visitors about that specific group of photos.
Mistake #33: Missing image ALT tags
Importance: 3/5 Difficulty: Medium Total time: A few hours to go through all your images
If you have no experience with HTML, here’s what you need to know: whenever an image appears on your site, it uses the following source code format:
<img src=”domain/path/filename.jpg” alt=”important text here” />
That value inside that ALT tag is the main point of interest for Google when looking to “understand” an image (the others being the filename and the text around the image on the page). Search engines don’t have the practice of looking into IPTC/EXIF information yet, so you can see why the ALT tag is important if you care about SEO.
Browsers also usually display the ALT tag in a tooltip when hovering over an image.
Your website platform should ideally automatically fill in the ALT tag using one of the main IPTC fields (like PhotoShelter does), or at least allow you to easily define it (like WordPress does).
On the topic of ALT tags, here’s an informative snippet from Google:
Not so good:
<img src=”puppy.jpg” alt=””/>
Better:
<img src=”puppy.jpg” alt=”puppy”/>
Best:
<img src=”puppy.jpg” alt=”Dalmatian puppy playing fetch”>
To be avoided
<img src=”puppy.jpg” alt=”puppy dog baby
dog pup pups puppies doggies pups litter puppies dog retriever
labrador wolfhound setter pointer puppy jack russell terrier
puppies dog food cheap dogfood puppy food”/>
“Filling alt attributes with keywords (“keyword stuffing”) results in a negative user experience, and may cause your site to be perceived as spam. Instead, focus on creating useful, information-rich content that uses keywords appropriately and in context. We recommend testing your content by using a text-only browser such as Lynx.”
Mistake #34: No image theft protection
Importance: 1/5 Difficulty: Easy Total time: 10-20 min.
If you’re using a service like PhotoShelter, you should be pretty safe. It allows you to add watermarks to your images, it disables right-click saving, and it always restricts website images to 1000 pixels (on the longest side).
People can nevertheless steal your 1000px images (by digging into the source code, or by taking a screenshot of the site), but at least they don’t have access to your original un-watermarked files!
So you should consider this when uploading images to regular platforms like WordPress: never upload high-resolution images there, even if your site just displays small versions of them. People can download your high-res files relatively easily in WordPress. That’s where watermarks usually come in, but not without disadvantages of their own.
If you absolutely need large images in WordPress, you can tighten security with some plugins (like this or this), but they can’t offer total protection. So with WordPress, be sure to resize your images as large as needed by the theme prior to uploading them.
Mistake #35: Using cheesy stock photos
Importance: 1/5 Difficulty: Easy Total time: 10-20 min.
Web designers understand the value of images in creating strong websites, and are forced to use stock photography sites as their source because they obviously don’t have the time & skills needed.
But as a professional photographer, you can’t get away with that.

 Ughhhh…
While I don’t expect this to happen very often with regular portfolio/gallery pages, some photographers have the bad habit of using cheesy stock images to illustrate their blog.
Sure, you might not have the skills of top-level stock photographers, but not being authentic is a form of deception.
Further reading:
- 10 Pitfalls to Avoid When Using Stock Photography [Design Shack]
- Using Royalty Free Stock Images in Website Templates [Stock Photo Guides]
- Stop Using Stock Photography Clichés [BoagWorld Blog]
- 7 types of stock images you must stop using today [Webmeup]
Mistake #36: Weak homepage
Importance: 1/5 Difficulty: Easy Total time: 10-20 min.
![]() This homepage doesn’t have any technical errors, this is just how the photographer intended to make it, completely empty, to try to force people to use the navigation menu.
This homepage doesn’t have any technical errors, this is just how the photographer intended to make it, completely empty, to try to force people to use the navigation menu.
If you walk past a clothing store window, and you see it absolutely empty/deserted, are you still inclined to go inside to ask for any coat hangers in the back?
Here’s what constitutes a bad homepage:
- doesn’t give a clear indication of what the site is all about (the type of photography you do, who you are)
- doesn’t “tell” the users what next actions they can take (see mistake #23 on calls-to-action)
- it’s outdated (displaying galleries or blog posts from 3 years ago)
- too crowded/confusing (white space is a critical part of design)
- too much text (get the message across in as few sentences as possible, eliminate the noise)
- too short: displaying just a slideshow on your homepage can be visually powerful if you know what you’re doing, but most of the time it helps to have a least a paragraph of text or a tagline, letting people know who you are and what you can do. And don’t forget that slideshows are sometimes bad for the user experience.
- content in the wrong order (important elements should be at the top, it’s what people see first)
- no easy way to access recent content (forcing people to dig around to find your work)
Further reading:
- 15 Examples of Brilliant Homepage Design [HubSpot]
- The Ten Most Violated Homepage Design Guidelines [Nielsen Norman Group]
- 10 Principles Of Effective Web Design [Smashing Magazine]
Mistake #37: No featured galleries or portfolios
Importance: 4/5 Difficulty: Easy Total time: 30 min.
Not all the visitors to your site have the time and patience to browse around through all your galleries to discover the real you. Sometimes they just ask themselves what your site is all about.
You probably have some strong content you’re most proud of, as you’ve evolved as a photographer over time. Advertise it, feature your best photos/galleries on the homepage. Don’t let people guessing. Choose your images wisely, and display them as large as possible.
The homepage is like a storefront, it’s the place where you can convince people to stay longer, to explore more of your work, to eventually contact or purchase from you.

A slideshow or grid with a selection of your best work is the absolute minimum. But you should also create featured galleries for your main photography categories.
And take a hint from this relevant article on 12 ways to freshen up your outdated photography website:
“[…] If you’re working with any sort of event-based projects (weddings, concerts), are you constantly putting up new work? If you have no new content to add, at least try to change the order of the slideshow images, bring new images in front. It’s better than nothing.”
Mistake #38: Shallow “About” page
Importance: 4/5 Difficulty: Medium Total time: 1h
Fantastic, you’re passionate about photography. What else though?
Users often come to your About page to learn more about your: skills, experience, qualifications, accreditations, awards, memberships, publications, age, location, etc.
So you should definitely respect your audience by giving them what they want, instead of wasting their time. Writing a professional biography (with a touch of your personality, sure) can help your visitors make better decisions and get closer to contacting you.
OK, I can hear some of your thoughts: sure, you don’t want the About page to be all stiff, so you should definitely include your personality and passions too. Also a good place to show your sense of humor, but not at the expense of the critical elements in the page.
I wrote a complete guide on crafting your About page content, it’s a must-read for all photographers out there: The complete guide to building your amazing photography “About” page

And if you’re just starting out and feel you don’t have much to write about, check out What to include on your About page if you’re new to photography?
Mistake #39: No self-portrait
Importance: 2/5 Difficulty: Easy Total time: 10 min.
Displaying a photo of yourself makes your site more trustworthy, more personable.
A portrait usually goes on the About page, and rarely on the homepage too, wherever you mention your name and write about yourself (which shouldn’t happen too often anyway).
The general rule of thumb is to be smiling in the portrait (unless you’re being more creative).
Without a portrait, people can’t usually relate to you or your work. It’s like completely avoiding eye contact when meeting face-to-face, it doesn’t send out a good message.
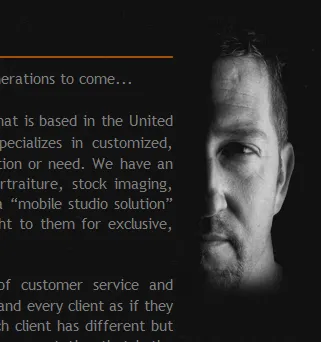
You can even get creative by using a self-portrait as a prominent element on your About page, as New Caledonia photographer Sebastien Merion did on his About page:

But even if you don’t want to go that far, always try to include at least a small portrait of yourself on the site.
Or at least half a portrait:

Mistake #40: No testimonials
Importance: 3/5 Difficulty: Medium Total time: Time to get more testimonials + 30 min.
When you sell photography services or products on your site, are you answering the “WHY”, “HOW” and “WHAT” questions?
HOW = detailing the benefits of working with you
WHAT = the list of services or products you offer
But don’t neglect the WHY: removing any anxiety from working with you, giving people reasons to trust you.
One of the best ways to do that is to showcase a few testimonials on your site, relevant quotes from past clients who were happy with your work.
Testimonials usually sit on the About page (the main place where people go to find out more about you), but they obviously work well on the specific pages where you display and sell your products or services, or where you talk about prices.
If you have a simpler site, with just regular image galleries, placing a few small testimonials on your homepage (usually lower down the page) can work well.
Further reading:
- 8 quick wins to improve your photography website > #3: Add some quality testimonials from past clients [ForegroundWeb]
- 12 quick actions you can do today to improve your photography website > #12: Display Social Proof [ForegroundWeb]
- How To Leverage Testimonials & Reviews To Get More Clients [The Modern Tog]
- Four Ways To Add Testimonials to Your Website [RoundPeg]
- Testimonials: How to Squeeze the Very Last Ounce of Conversions Out of Them [Visual Website Optimizer]
Mistake #41: Not addressing prices
Importance: 1/5 Difficulty: Medium Total time: 1h
If you work with specific price packages, by all means, write them on your website. Asking people to contact you first sounds like you’re too expensive and functions like a road block, not everybody goes through the hassle, they move to another site.
If your work depends on specific client requests (client importance, project difficulty, location, exposure, usage terms etc.), sure, you can’t define exact prices, but you can at least address the issue of prices on your site. Tell people what it depends on, offer to learn more about the project and send an estimate, re-assure them that there aren’t any hidden costs. By eliminating some of the (normal) uncertainty for your clients, you can achieve greater success in your photo business.
If people are shopping around for prices (for a photography job), they will surely go where they can get that answer, or at least where they have easier access to an answer.
I understand it can be daunting, you’re probably scared your competition learns your prices and tries to undercut them. But at least try this as an experiment: put your prices on the site, or at least address the issue of costs. You’ll most likely get more clients and also pre-qualify your leads and clarify expectations.
Further reading:
Huge mistake #42: No contact info
Importance: 5/5 Difficulty: Easy Total time: 15 min.
Not having a contact page is one of the easiest ways to avoid clients. But people are still making this mistake, so I need to say this loud & clear.
You might have some excuses…
- my design is abstract/creative
- I know what I’m doing here
- someone I know told me xyz…
- I already write my email on the About page
- I prefer to email clients directly
- I’m not looking for clients at the moment
- my website is just to show images
- I’m just starting out
None of these arguments can justify not having a contact page.
Even if you just have an email address (don’t want to give your phone number), write that on a separate Contact page. But consider adding your location too, and a contact form, this should increase the number of people contacting you.
And if you’re not actively looking for work, people still need to be able to contact you for recommendations, problems, praise, requests etc., or just for fun.
Ideally, you should make it really easy for people to contact you by posting your main contact info on every page (in the footer usually), so it’s right there on their fingertips.
Make sure the email link is clickable (a mailto: link), so people don’t have to manually copy-paste it. Oh, and make sure it’s text, not an image!
For your phone number use regular spaces between digit groups, this allows mobile visitors to just tap on it to get a call/contact prompt, instead of having to remember or copy it. Use a prefix or country code too if you have international clients.

 A message like this can be placed in the footer throughout your site.
A note on contact forms: they’re great, they increase the number of messages you receive because some people prefer to use a form instead of going into their email client. But don’t exclude the plan-and-simple email link either.
Everything you need to know about Contact pages in my in-depth guide: The essentials of building an effective photography “Contact” page

Mistake #43: Long contact forms
Importance: 4/5 Difficulty: Easy Total time: 15 min.
If you want as many people as possible to use your contact form (or any other form you might be using on your site), the main thing to consider is to reduce the number of fields.
The second is to not use a weird text for the submit button, just go with the regular options: “Send”, “Go”, “Click here”, “Download”, “Add to card”, “Buy” etc., depending on the purpose of your form.
You might sometimes be interested in obtaining people’s address, phone, birth date, number of cats owned, age, location etc., but that will only make people shy away from all the hassle. You’ll get a lot fewer messages.
Studies have shown that you lose about 5% of your form’s conversion rate if you ask for a phone. If it’s not critical, avoid asking for it. Once you start an email conversation, you can ask for it then.
For contact forms, “Email” and “Message” are the minimum, “Name” is usually being asked too.
With some exceptions, one single field for “Name” is enough, do you really need to separately ask for First Name and Last Name? It’s a small thing, but they add up.
Further reading:
Mistake #44: No specified location
Importance: 4/5 Difficulty: Easy Total time: 15 min.
Most people interested in your work (and reaching your site) probably run into the same question: how much does this photographer charge?
But their second question is usually: where is this person from?
Don’t make users waste time digging through your site to find a mention of a city and country.
Posting your location isn’t just for satisfying their curiosity, it can actually get your more clients. Location is often times an important factor used for hiring people, it’s what might separate you from your competition.
This is especially important for photographers offering location-specific services (events, weddings etc.)

At a minimum, you should post your location on the Contact page (where people expect to find it). But depending on your site’s design, placing it in the footer on all pages might also be a good idea.
If you’re willing to travel, then by all means, advertise it. When people from another continent love your images, they need to know they can work with you regardless of your location.
Bonus: why not also put your location in the SEO meta description tag of your site’s homepage? This can sometimes make all the difference for clients staring confused at Google search results pages.
Bonus: Business listing on Google: be sure to get your free Google My Business listing to appear alongside URLs in search results:

Mistake #45: Unprofessional email address
Importance: 2/5 Difficulty: Easy Total time: 30 min.
One of the first things you should do when starting a photography business is to set up a professional email address. That means under your site’s domain: john@yoursitedomain.com or contact@johndoephotography.com
Even if you are an amateur, you don’t need to put out that impression. So you should stop using your personal Gmail/Hotmail/Yahoo/etc. addresses on your site.
Oh, and never use any irrelevant letters in the email address.
Put yourself in a client’s shoes: would you trust contacting these (made-up) photographers: sharkrobot14hgkz73@gmail.com or superjohn_1967@yahoo.com?
Reliable web hosting providers allow creating unlimited email accounts under the same domain you own with them. If you don’t have one already, create an email address on your domain and start using it whenever contacting work-related people. You should be a professional.
And if you’re fond of using your existing email client, you can surely add it as an (alias) account in there. For example, I use Gmail for both my personal and work email addresses, Gmail is smart enough to always reply using the email account the email was received on.
While we’re on this topic, don’t forget to follow the best practices for email signatures.
Mistake #46: Text-only or image-only blog posts
Importance: 3/5 Difficulty: Hard Total time: It depends
This should be self-explanatory.
You run a photography site. Don’t make your blog posts text-only, it doesn’t make any sense.
The opposite is also true: just posting images as blog posts provides very little value, for both users and search engines. (Aside from the image ALT tags, you are adding those, right?)
Storytelling is a great way to outline your unique photography style, to show your sense of humor and set a warm tone for your blog/site.

For blogging content ideas and how to leverage your blog to grow your business, check out my blogging course for photographers.
Mistake #47: No social media sharing buttons
Importance: 3/5 Difficulty: Easy Total time: 15 min.
It would be useful to first make the distinction between share buttons and profile links.
You should definitely have share buttons, visitors can use them to recommend your images/content on their social media accounts of choice, helping you get more exposure.
This simply requires you to install a social sharing plugin (like ShareThis), but most probably your website provider or theme already has those integrated. Just make sure they’re enabled.
Profile links are simply (text or graphical) links to your social media profiles, allowing people to connect with you there, add you as a friend, follow your tweets etc. This assumes you have invested time to set-up your accounts there (Facebook, Twitter, Google Plus are the main ones) and are updating them frequently.
Some of you might feel that you don’t want to get on board the whole social media train because:
- you’re already a successful photographer, don’t need any extra marketing (are you really that sure?)
- you don’t have time (understandable sometimes, yes)
- don’t find them useful (not true, look around)
But at least add the sharing buttons, that requires virtually no work on your part (besides enabling them). Your audience does the hard work of spreading your images across the Internet.
Further reading:
- 8 quick wins to improve your photography website > #7: Make your website look good when shared on social media [ForegroundWeb]
- Social Media for Photographers: Let’s Get Real for a Moment [PhotoShelter blog]
- The Photographer’s Social Media Handbook [PhotoShelter free guide]
Mistake #48: No email newsletter sign-up
Importance: 2/5 Difficulty: Hard Total time: 20 min. set-up + a lot more time to prepare content for the newsletter
Mostly useful for photographers who also write a blog, the email newsletter is one of the best marketing tools you can get.
 An email list is hard to grow (or at least maintain), it requires adding frequent posts/updates and providing value to your subscribers. And although that number of people is relatively smaller than the actual website traffic, it’s a lot more targeted: they are people who opted in to get updates, they like your work and want to see more of it.
Besides broadcasting your blog posts to the email newsletter, you can also use it to promote your new services/products or to ask questions from your audience. It can be a great way to turn regular readers into potential customers.
For all things concerned, I recommend using MailChimp, it’s hands-down the most powerful and well-designed email newsletter service out there, and it’s free for up to 2000 subscribers, so it’s easy to get started with it for free until you reach a certain level. MailChimp can provide you with a newsletter subscribe box to put on your site, I’m sure you’ve seen them in sidebars on various websites.MailChimp, it’s hands-down the most powerful and well-designed email newsletter service out there, and it’s free for up to 2000 subscribers, so it’s easy to get started with it for free until you reach a certain level. MailChimp can provide you with a newsletter subscribe box to put on your site, I’m sure you’ve seen them in sidebars on various websites.
Don’t forget to follow best practices and include unsubscribe links to your email campaigns, otherwise, your emails will end up in spam folders.
Further reading:
- 15 best features of successful photo websites (and how to design yours) > #15: Email newsletter [ForegroundWeb]
- Grow Your Photography Email List [Graph Paper Press]
Mistake #49: No updates in years
Importance: 4/5 Difficulty: Hard Total time: As long as it takes to freshen up your site
OK, everybody knows that blogs should be frequently updated. But what about regular photography or portfolio websites?
I’ve seen a ton of examples out there which have not been touched in months or years, and that’s surely not the way to build an audience.
You need to show the world that your “storefront” is active, and not abandoned.
Featured images should be updated at least once in a (short) while, cycling through your recent projects. Even if you’re very busy with work or personal stuff, or you’re traveling a lot, you can still take a little time to freshen up your site.
Use batching to save time: once in a while go through your archive and prepare a few sets of images to feature on your site. Have them ready. Then every week or so, when you have 15 minutes available, go into your site’s admin area and swap some images/galleries. At least this much.
And if you’ve recently done some training, received an award or won a prize, or simply worked with a cool client, post it on your site.
Don’t let your website become stale, you’re missing out on more opportunities. Not to mention that Google values fresh content and starts indexing your site more often as a result.
One way photographers handle this problem is to include a “Recently updated” section on their homepage, showcasing their most recent work. Here are 12 ways to freshen up your outdated photo website.
Mistake #50: Ignoring on-site SEO
Importance: 4/5 Difficulty: Easy Total time: 1h
You can’t simply expect to add images and a few text pages on the site, and immediately end of on the first page of Google search results (for specific keywords).
OK, it might be just a presentation/portfolio site, or you might not be interested in search engine traffic, but you should still, at a minimum, enter your title and meta description tags for all your site’s pages. These are the two fields that (usually) show up in Google search results and can convince people to give you their mouse click.
All website platforms allow setting the page title and meta description. For WordPress, use the great Yoast SEO plugin. If using image management/archival services like PhotoShelter, your job gets a lot easier: all image pages automatically set these SEO tags using IPTC info. Be sure to fill in gallery descriptions, though, these end up in SEO meta description tags.
When you start learning how powerful SEO can be, you might be tempted to use some dodgy “black-hat” SEO practices to try to “game” the system.
Don’t, just don’t. Google will take notice and your site’s rankings will plummet:
🦖 “Dinosaur” SEO tactics: stop wasting time on outdated SEO tactics and instead focus on what Google now cares about
Further reading:
- The complete SEO guide for photographers: 50 tips to maximize your Google rankings & get found online [ForegroundWeb]
- SEO for Photographers Bootcamp & Guide [PhotoShelter]
- The beginner’s guide to SEO [Moz]
Mistake #51: Ignoring off-site SEO
Importance: 4/5 Difficulty: Hard Total time: Ongoing
Getting links back to your site is critical to your SEO success. Google looks at the number and relevancy of websites linking back to you as a sign of trust and quality.
Off-site SEO is difficult and it takes a lot of time (whereas on-site SEO is easier, anybody can update the SEO tags on their pages). But you can start working on getting more links back to your site by updating all your online profiles and reaching out to any friends and partners you have in the industry.
Launching a website is not a set-it-and-forget-it project, and neither is SEO, you have to constantly show Google signs for trustworthiness, and getting more back-links is great for that.
Get some advice on link-building and further resources here:

Mistake #52: No XML sitemaps
Importance: 3/5 Difficulty: Easy Total time: 15 min.
XML sitemaps are well-formatted lists of your site’s pages, to help search engines “know” about your site structure and update frequency, and speed up the indexing process.
A respectable website platform automatically generates an XML sitemap file for search engines.
PhotoShelter does automatically generate and submit it to Google for you. WordPress does this really well too with the help of the WordPress SEO plugin from Yoast.
But depending on how your website is built, you might not have a sitemap, making it more difficult to get indexed by search engines.
So by all means, please as your developer to check that your site is generating a sitemap file and that it then gets properly submitted to Google Search Console.
Further reading:
Mistake #53: Focusing only on SEO
Importance: 4/5 Difficulty: Medium Total time: Instantaneous mindset shift
Like with many other things in life, opposites are bad. So paying too much attention to on-site SEO can also have a bad effect on your site.
Your main goal should be to create content for humans, for your target audience.
If you take the opposite approach, and write specifically for search engines, the end result is usually more difficult to read or with a “fake” tone. You also run the risk of going overboard with this, and what do you know… Google has a penalty for that (though it seems it’s hard to get that far).
So what is the right balance?
Keep a good readability, don’t jam keywords into the text, forget about keyword density. Focus on well-written content and providing value to your users.
Further reading:
- 10 important mindset shifts to finally take your website & business to the next level [ForegroundWeb]
- SEO-Optimized Web Content: How Do You Optimize Without Overdoing It? [SocialMedia Today]
- How to Avoid Over-Optimizing Your Website
Mistake #54: Going too far with ads
Importance: 2/5 Difficulty: Easy Total time: It depends
Unless you’re (discreetly) trying to market a very powerful photography blog, intrusive ads should not be present on your site, they might do more harm.
Especially not Google text ads, they always look very amateurish.
And funny thing: having too many ads can actually negatively affect your site’s rankings.
If you’ve grown a successful site, with a lot of traffic, then ads might be a good way to try to monetize it, it’s just a matter of how you do it. You can be elegant, or you can be too aggressive.
But if you’re just starting out, or don’t yet have a large amount of traffic (thousands+/day), ads won’t help you financially, it’s an almost impossible war you’re fighting.
And for your experiments, the side-effect is that you’ll be alienating those few existing visitors, to begin with.
Further reading:
Mistake #55: Poor spelling, grammar, semantics
Importance: 4/5 Difficulty: Easy Total time: 1-2h
This usually just shows how much you care :-)
Due to not being a native English speaker, or out of simple negligence, mistakes fall through the cracks.
You should always double check all your texts and even get somebody else to proofread your content. Then check again.
People are very quick to notice mistakes, and they lose trust once they spot too many writing errors, they get put off by the obvious lack of care. This is even more valid today when you have a very short amount of time to create a good impression, surrounded by tough competition. Grammar errors put you in a bad light from the start, you’re only playing catch-up afterward.
A quick note on blog comments: you can’t really control the quality of your user’s comments (unless you want to edit/delete misspelled comments manually all the time), and it’s not really that important anyway. Don’t take my word for it: Matt Cutts Explains How Comments With Bad Spelling and Grammar Affect A Page’s Ability to Rank [Search Engine Journal]
Mistake #56: Launching without proper testing
Importance: 5/5 Difficulty: Medium Total time: A couple of extra hours before launch
Regardless of whether you’re using a pre-designed theme or hiring a web-design company for a full-featured solution, testing your site should not be neglected.
And don’t just try to review it yourself, you need “outside” people to give you feedback. You’ll be amazed of what a fresh pair of eyes can discover.
Double-check for:
- design issues (both desktop and mobile)
- broken navigation
- missing/bad SEO
- any remaining dummy/test content
- spell checking, proofreading, consistent capitalization,
- repetitive phrases
- all other mistakes mentioned in this guide :-)
As you can see, it’s not just a matter of finding typos in your texts. A site tester (even if it’s just a friend or relative) can give you some interesting insights (“I was confused on that page, I didn’t know where to contact you…”) or report weird things (“Everything was fine in Safari, but I tried your site in Firefox and the homepage was all messed up…”).
It won’t help with everything, but you can make your life easier with a website testing tool like Nibbler.
Mistake #57: Dummy/test content
Importance: 4/5 Difficulty: Easy Total time: 20 min.
The words “Lorem ipsum” should not be present on your live site :-)
It’s common for web designers & developers to add some dummy content to the site when first building it. Ideally, you, as the website owner, should try to have the content ready before any website (re)design, working a design around existing content is much easier than guessing what the content will be. This streamlines the process and makes it simpler and faster for everyone.
But that’s not always possible.
Before launching, though, make sure your website no longer contains sample images or dummy texts. Once again, they shout “I don’t care”.
Same applies for any “Coming soon” or “Under development” messages.
Lorem Ipsum Checker Tools:
Mistake #58: Difficult eCommerce process
Importance: 5/5 Difficulty: Difficult Total time: A few hours, you might need changing your site platform/plugins
 Powerful website platforms (like PhotoShelter) now give incredible power in the hands of any photographers: delivering images to clients, sharing on social media, licensing images, automated printing and shipping etc.
WordPress sites can cover some of the same features using plugins like:
- WooCommerce + WooCommerce Photography extension
- WooCommerce + Envira Gallery addon
- Sunshine Photo Cart
- NextGen Pro
So there’s no longer an excuse to provide a bad eCommerce experience if you’re selling something on your site. Almost all the options you have are listed here: eCommerce solutions for photographers: how to sell images & services on your photography website
Most photo buyers, whether they’re casual wedding clients or professional editorial agencies, always prefer the ability to purchase images/prints straight from the website. So simply displaying a short message (“Please contact me for…”) doesn’t cut it anymore. Notable exceptions: signed prints, custom work, out-of-stock products.
Take action: try obtaining feedback from your users on their experience with the purchase process on your site, or set-up goals inside your Google Analytics account (and view your goal funnel). Read more about this:
- A Guide To: Goals And Funnels In Google Analytics [Hongkiat]
- The Google Analytics Conversion Funnel Survival Guide [KISSmetrics Blog]
Mistake #59: No backups
Importance: 5/5 Difficulty: Easy Total time: 30 min.
It’s a good practice to make regular backups of your site. And don’t just leave your backups on your hosting server, download them to your computer and/or store them in your Dropbox or Google Drive account.
If something happens to your hosting provider, you have a safety net to fall onto. It also protects you from installing faulty themes & plugins, or running into your hosting’s traffic/bandwidth limitations.
Hiring a designer to overhaul your site, make sure they’re first doing a full backup of your existing site in case anything goes wrong, or your relationship with them ends prematurely.
For WordPress users, a free plugin like UpdraftPlus does the job well (be sure to backup both database and files). More on this topic here: Backing up your photography website – guidelines & resources
Mistake #60: Outdated and insecure themes & plugins
Importance: 5/5 Difficulty: Medium Total time: A few hours per month
WordPress is a powerful tool, but it also requires a lot of work. Without keeping your themes and plugins up to date, you risk running into problems sooner or later.
Almost every WP security exploit targets older versions of themes and plugins, so you need to get into the habit of updating everything at least once a month. That way, besides the security fixes, you also can new features and options, or even better design tools (like an updated page builder or a better slideshow feature).
Particularly important are WP themes, you want to choose a time-tested theme that’s being actively developed and tested. Here are some of my favorite WordPress theme.
As for WP plugins, look no further than this set of plugins I gathered over time: Curated list of the best WP plugins for photographers.
If managing the complexity of WordPress is not something you have time for, I got you covered. I offer a comprehensive WordPress care plan service that makes sure your WP site is secure and running smoothly.
For a small monthly cost, I’ll be taking care of all the WordPress maintenance tasks, letting you focus on other tasks in your business. The service is all about prevention and having a trusted person to offer support when needed.
ForegroundWeb WordPress care plan
Or you can learn to manage WP yourself by enrolling in my detailed course on this topic:
Mistake #61: Poor/negligent website security
Importance: 5/5 Difficulty: Easy Total time: 10 min.
No need to further explain this: please make sure you use a strong password for the admin area of your site. Don’t use your first name followed by your birth year, or things like that. And try using different passwords for different services.
You don’t have to remember them all, you can use a tool like LastPass or 1Password.
And if you’re using WordPress, use a good security plugin.
Further reading:
- Create a strong password & a more secure account [Google]
- The Ultimate Guide for Creating Strong Passwords [The Geek Stuff]
Mistake #62: Broken links or functionality
Importance: 5/5 Difficulty: Easy Total time: 10 min.
This comes down to testing again.
Whenever you add or remove content from your site, be sure to also update your navigation accordingly.
This is especially important for hybrid sites (integrating two or more different platforms, like PhotoShelter and WordPress): changes in one area need to also be made (or synced) in the other site area, so the navigation is consistent and up-to-date throughout the site.
This is even more important for people changing domains: double-check your entire site. And if you have outside links pointing to previously removed content, at least try redirecting people to other relevant pages instead of letting them hit a 404-error page.
People running into broken links immediately lose trust and patience. You don’t want to look like you don’t care.
Oh, almost forgot: if you have a contact form, please make sure it’s working (from a phone/tablet too), that’s probably the most important website functionality you need.
Using WordPress? Install a tool that helps you find broken links.
Also, don’t forget to use Google Search Console to detect crawl errors.
Mistake #63: No analytics or business metrics
Importance: 4/5 Difficulty: Medium Total time: 1h
You surely know you can use Google Analytics to track your website traffic and other interesting stats, but those are just part of a bigger equation.
If you’re just starting out, you need to start developing a business mindset. Looking at a shallow analytics graph means nothing without knowing why they’re important. Why do you want to get more traffic? What do you really want people to do on your site?

Start by deciding your 2-3 main purposes for the site: what do you want to achieve? The answers might be (but not limited to): revenue, number of new and returning clients, search engine results, engagement (number of shares, tweets, comments) etc.
You can apply a similar mindset to any other online marketing efforts you take. Example: tracking how many messages you get from Twitter vs Facebook informs you what social media platform you should focus more of your time on.
Further reading:
- Google Analytics for Photographers [free PhotoShelter guide]
- Tracking internal site search in Google Analytics [ForegroundWeb]
Bonus: Expecting your site to do all the work
As you can see, photography websites are complex things, and there are a lot of details you need to cover to make sure the site’s doing a good job promoting your work. That’s why it’s easy to get stuck on implementing fixes, and you start loosing the core focus: the quality of your images.
Websites act like a multiplier to the quality of work you put out there, you can’t expect to have success with bad images, regardless how mesmerizing your website is.
I’ve written a short essay on this topic, don’t forget to read that too: Images matter most, stop looking for shortcuts.
Your site can be a powerful tool in your career, but it’s just that: a tool. You can’t just rely on it as your only business plan. You can learn how to use it, how to leverage it correctly. It’s a continuous challenge, you need to be in it for the long run: adding more content, engaging with your visitors, taking risks, constantly improving.
Fix your critical website mistakes, but then go out and take epic images.
Losing this focus is the biggest mistake you can make!
Thank-you!
As you can see, most of my tips call for simplicity, for always asking yourself “How would this be better for my audience?”. Providing real value to people usually gets you out of trouble.
The notes for each mistake weren’t very extensive, it was just a brief overview of what you can do to improve your site. Detailed action steps are maybe the purpose of future articles :-)
Armed with the ideas and advice in this guide, go and review your site, and start making some changes today! You’ll be happy you did.
You can get this guide in a tablet-friendly PDF form when subscribing to the free ForegroundWeb newsletter.

And if you found it useful in any way, tell other people about it to get their own copy.
Thank-you!
– Alex